
Sign In
Welcome! Sign In to personalize your Cat.com experience
If you already have an existing account with another Cat App, you can use the same account to sign in here
Register Now
One Account. All of Cat.
Your Caterpillar account is the single account you use to log in to select services and applications we offer. Shop for parts and machines online, manage your fleet, go mobile, and more.
Account Information
Site Settings
Security
DIY service and maintenance for mini excavators
Watch the video to see how to use the easy-servicing features on the Next Generation Mini Excavators.
In this video, find out how to do daily checks and maintenance for the 1-2 ton range of Next Generation Mini Excavators. Plus, see how to raise the cab to access all components within the machine.
You can quickly and easily raise the cab to access components within the machine. The process takes less than five minutes using standard tools. By raising the cab you can reach all parts of the engine, plus the hydraulic and electrical systems.
Watch the video to see how it’s done.

In this video…
- Introduction (0:00)
- Service intervals and grease locations (0:25)
- Side and rear access panels (1:10)
- Access to hydraulic tank, pump and battery isolator (2:40)
- Battery access (3:25)
- How to raise the hinged cab or canopy (4:00)
- Components overview (5:50)
This video applies to the following models: 301.5, 301.6, 301.7CR, 301.8, 302CR
More support for your Next Generation Mini Excavator
If you’re a Cat® customer, you can log in to my.cat.com or check the operation and maintenance manual included with your machine to find out about:
- the current health of your Cat machine
- service requirements
- instructions and check-lists to make servicing and maintenance easy.
Access operation and maintenance manuals, parts manuals and further instructions online.
See the full range of Cat® Mini Excavators
-
- Net Power
- 13 HP
- 9.6 kW
- Operating Weight
- 2061 lb
- 935 kg
- Dig Depth
- 68 in
- 1731 mm
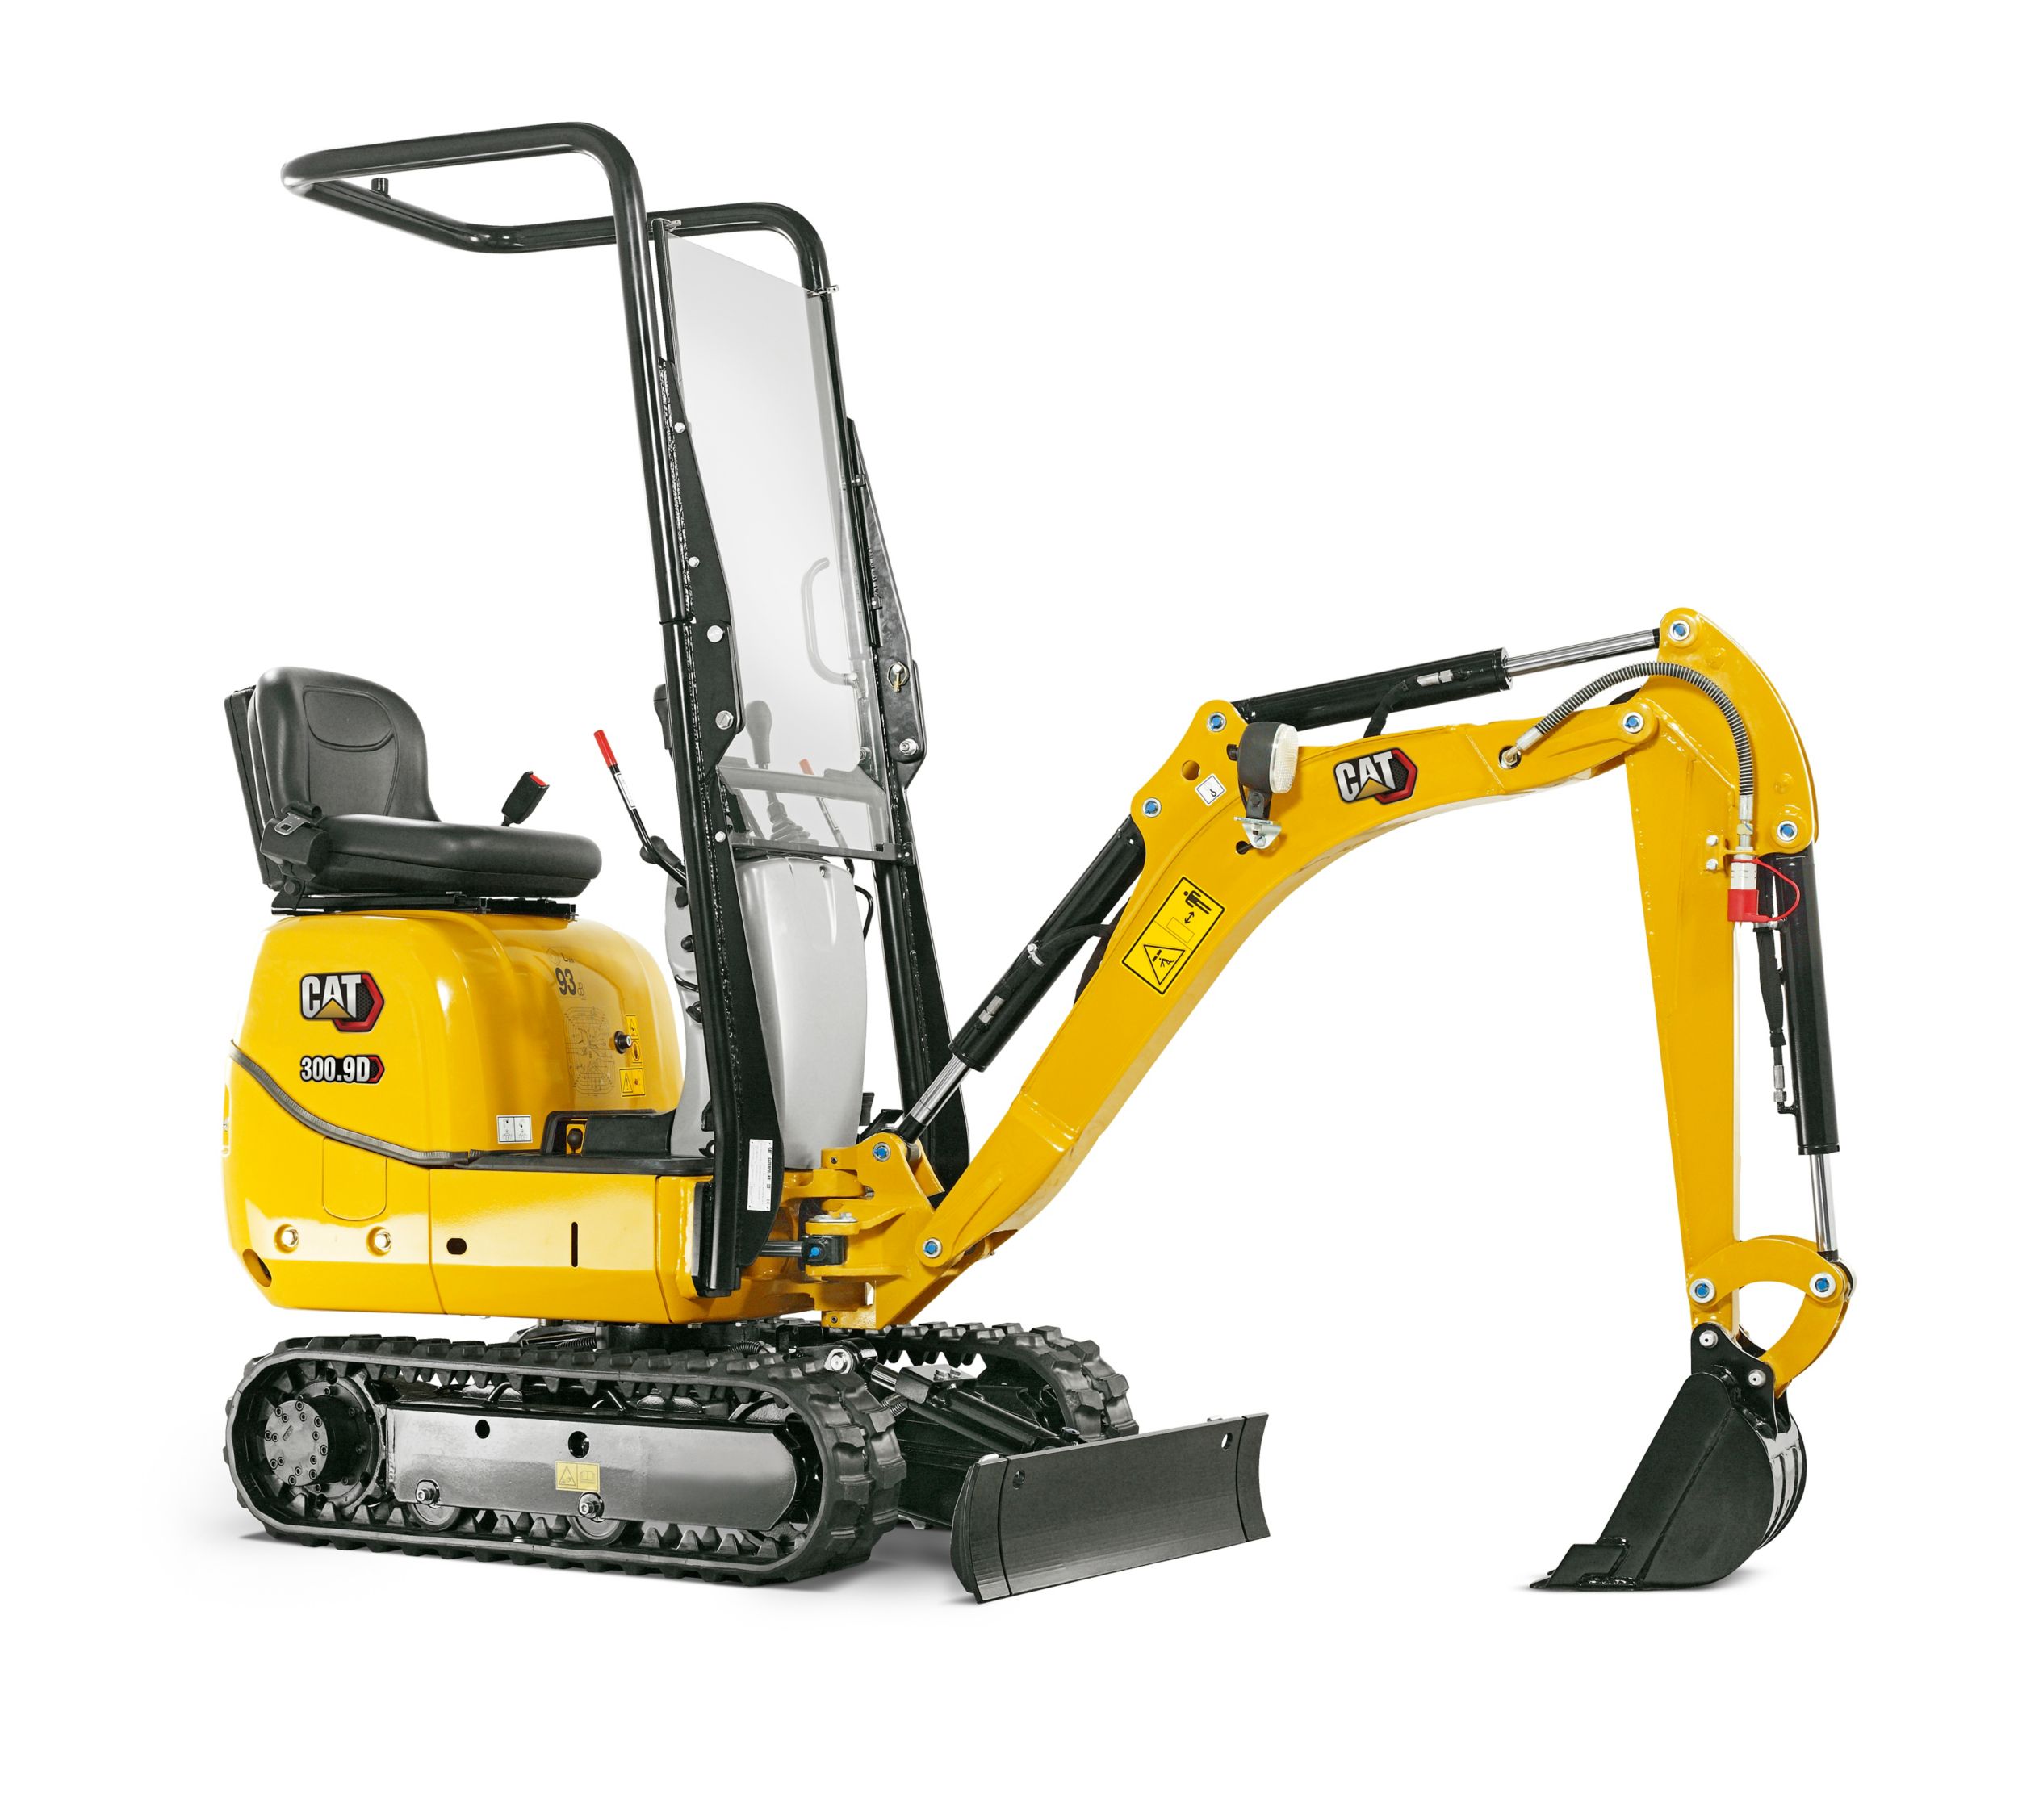
300.9D
The Cat 300.9D Mini Excavator delivers power and performance in a compact size to help you work in the tightest applications. Its ability to fit through a narrow doorway makes it an excellent machine for indoor demolition work.
Learn More -
- Net Power
- 13 HP
- 9.7 kW
- Operating Weight
- 2399 lb
- 1088 kg
- Dig Depth
- 68 in
- 1731 mm
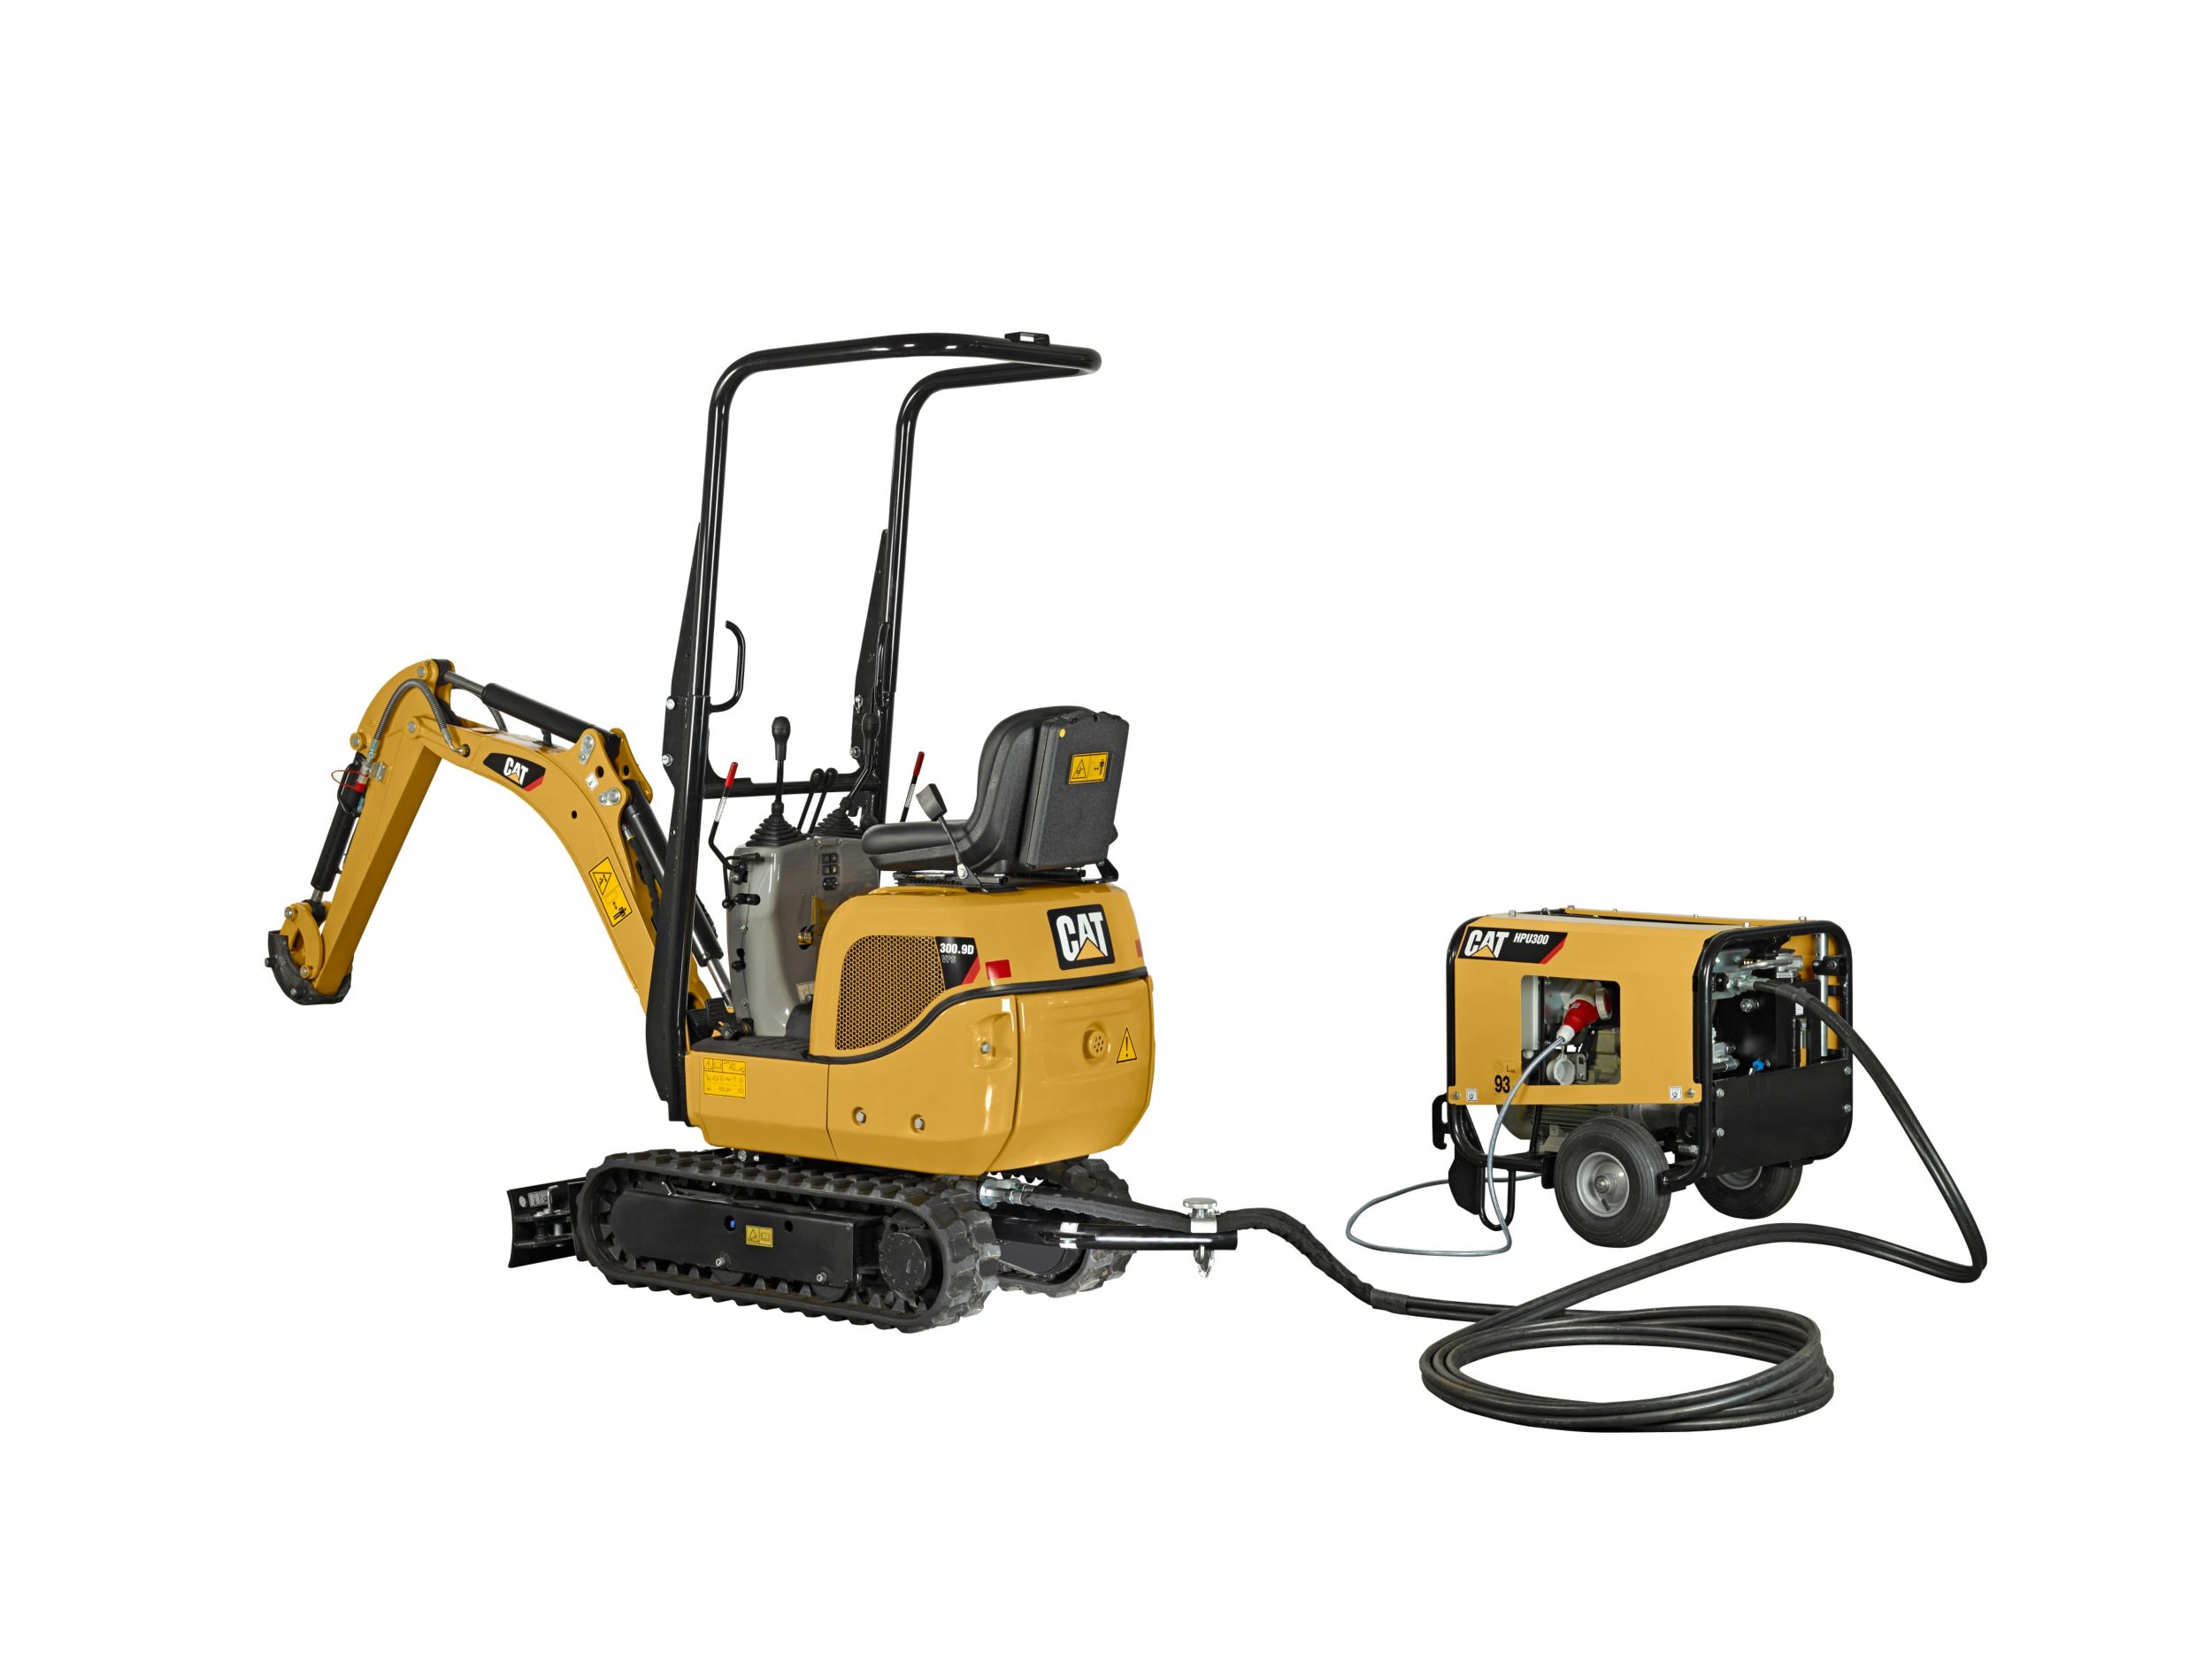
300.9D VPS & HPU300
The innovative Cat 300.9D VPS with HPU300 Mini Excavator delivers versatility in a compact size with a choice of diesel or electric power. Its ability to fit through a narrow doorway makes it an excellent machine for indoor demolition work.
Learn More -
- Net Power
- 21 HP
- 15.7 kW
- Operating Weight
- 3913 lb
- 1775 kg
- Dig Depth
- 100 in
- 2540 mm
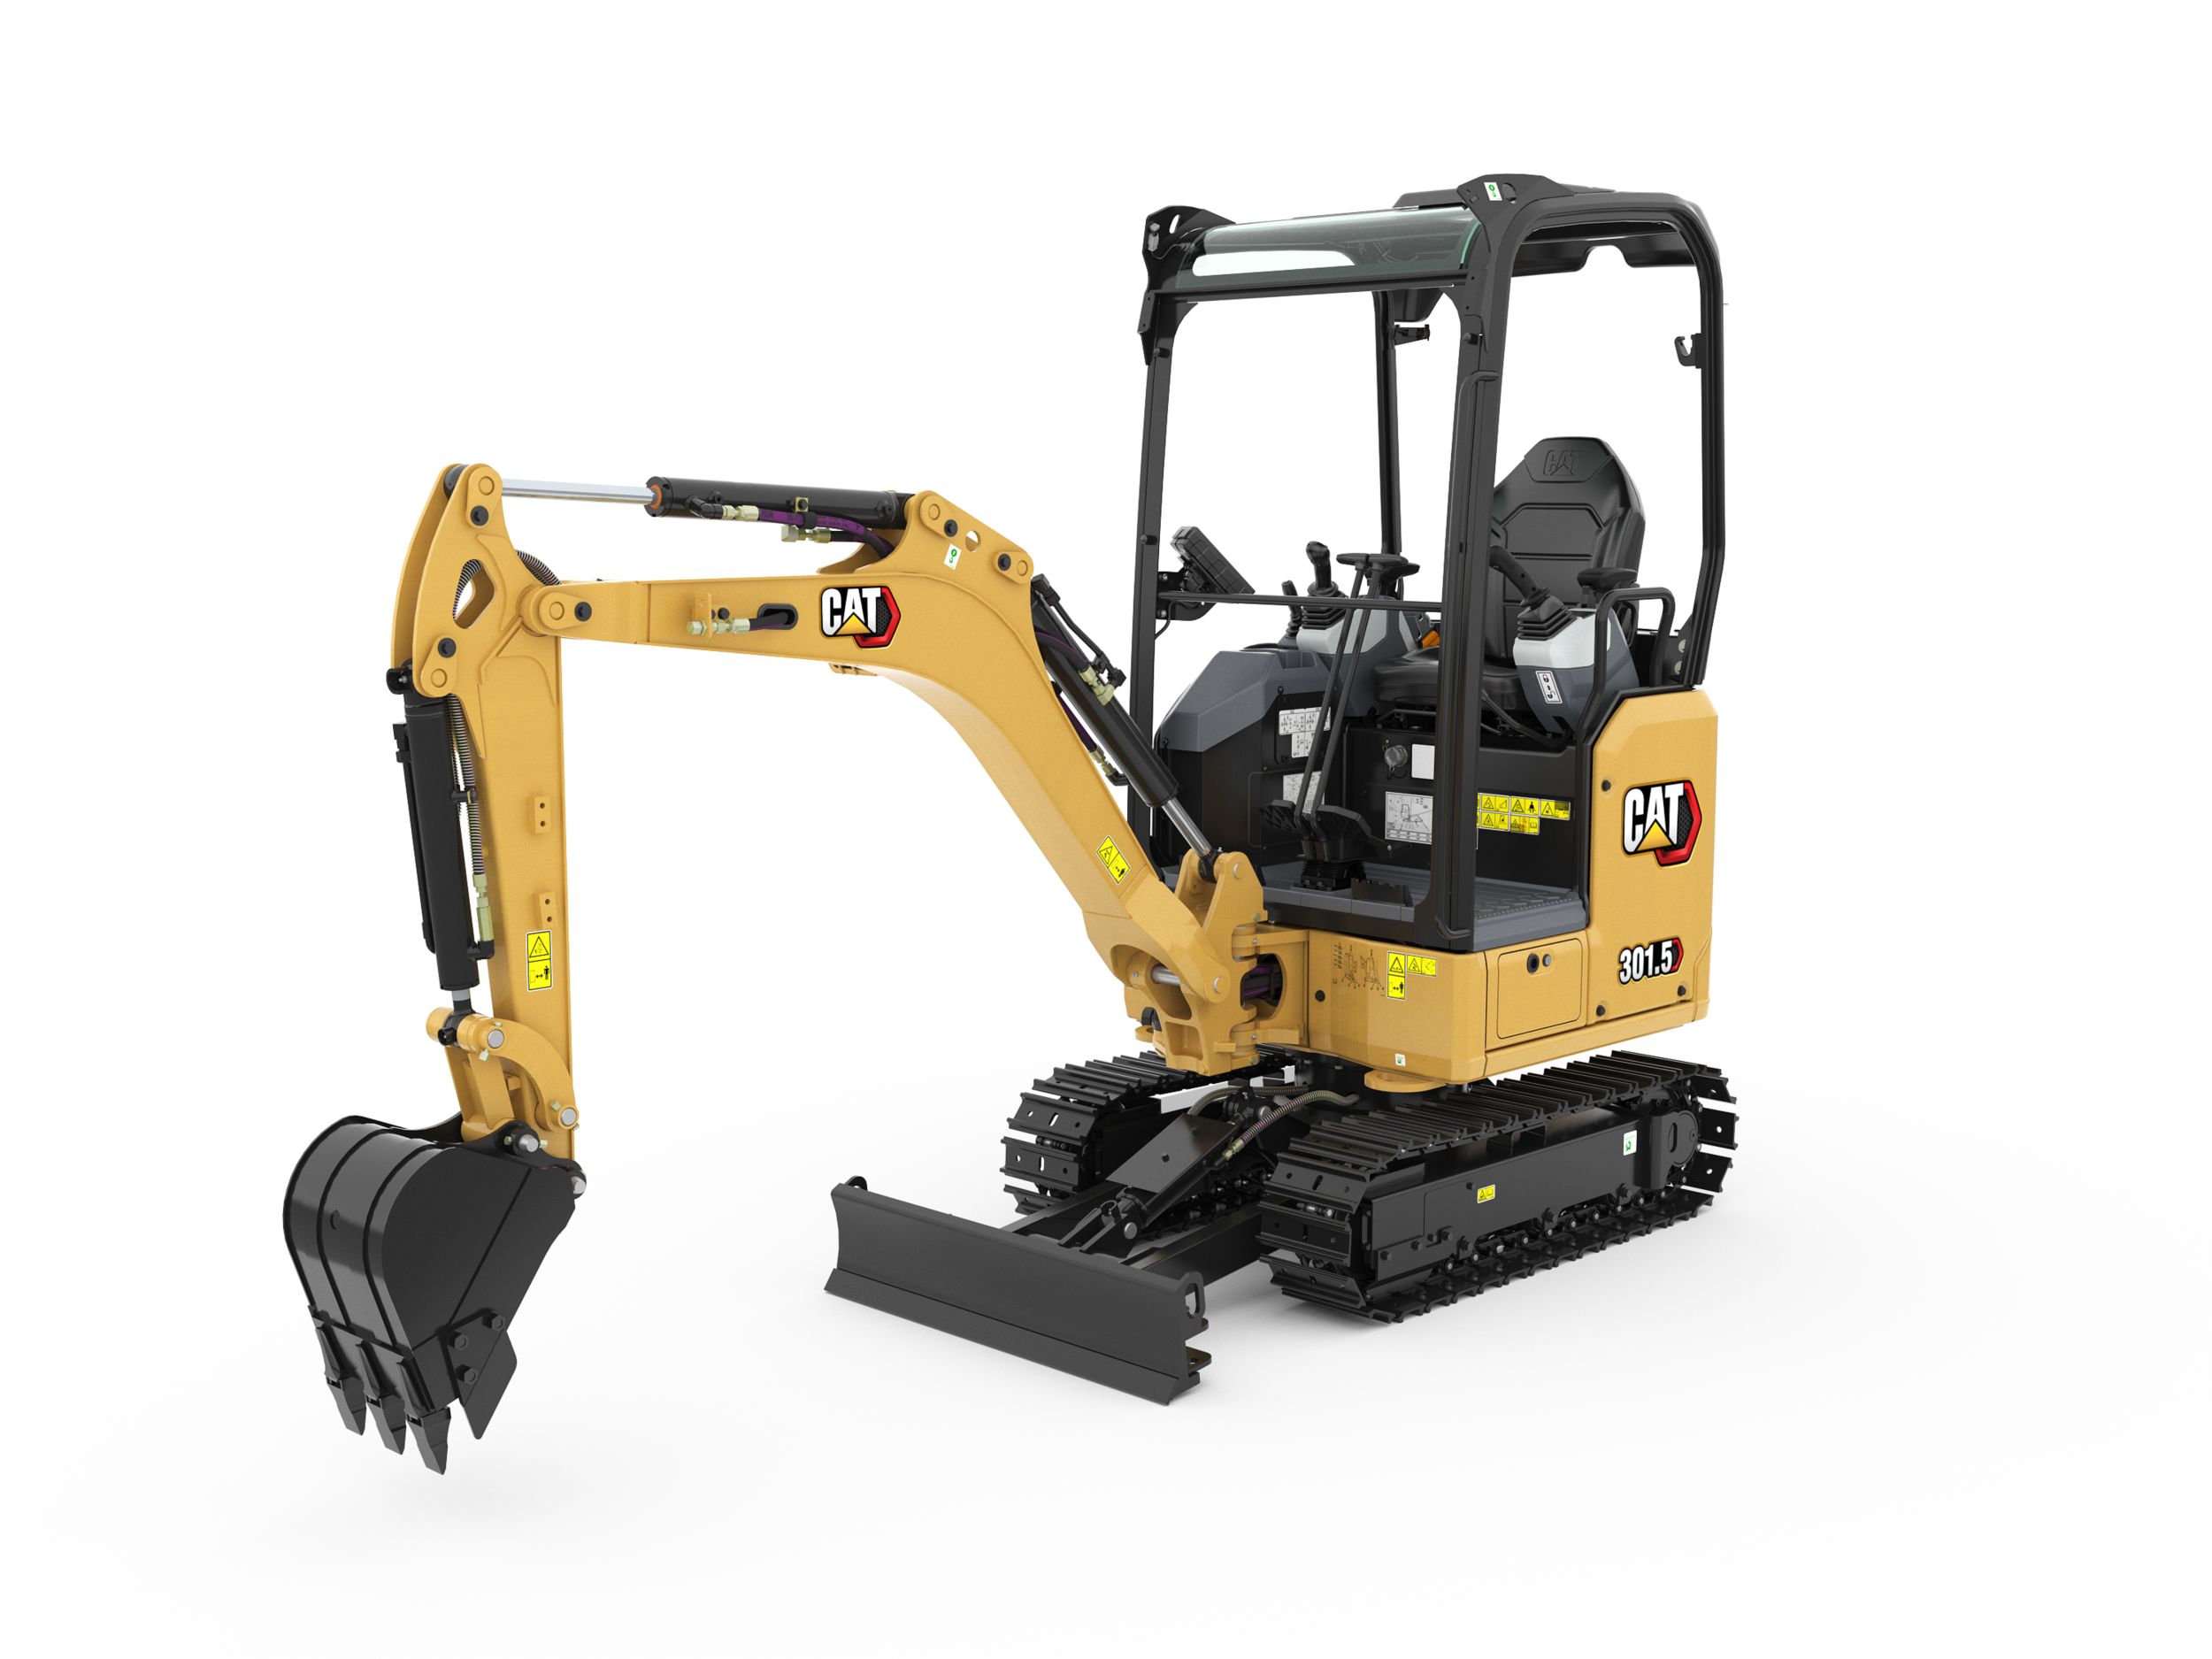
301.5
The Cat® 301.5 Mini Excavator delivers power and performance in a compact size to help you work in a wide range of applications.
Learn More -
- Net Power
- 21 HP
- 15.7 kW
- Operating Weight
- 4317 lb
- 1958 kg
- Dig Depth
- 100 in
- 2540 mm
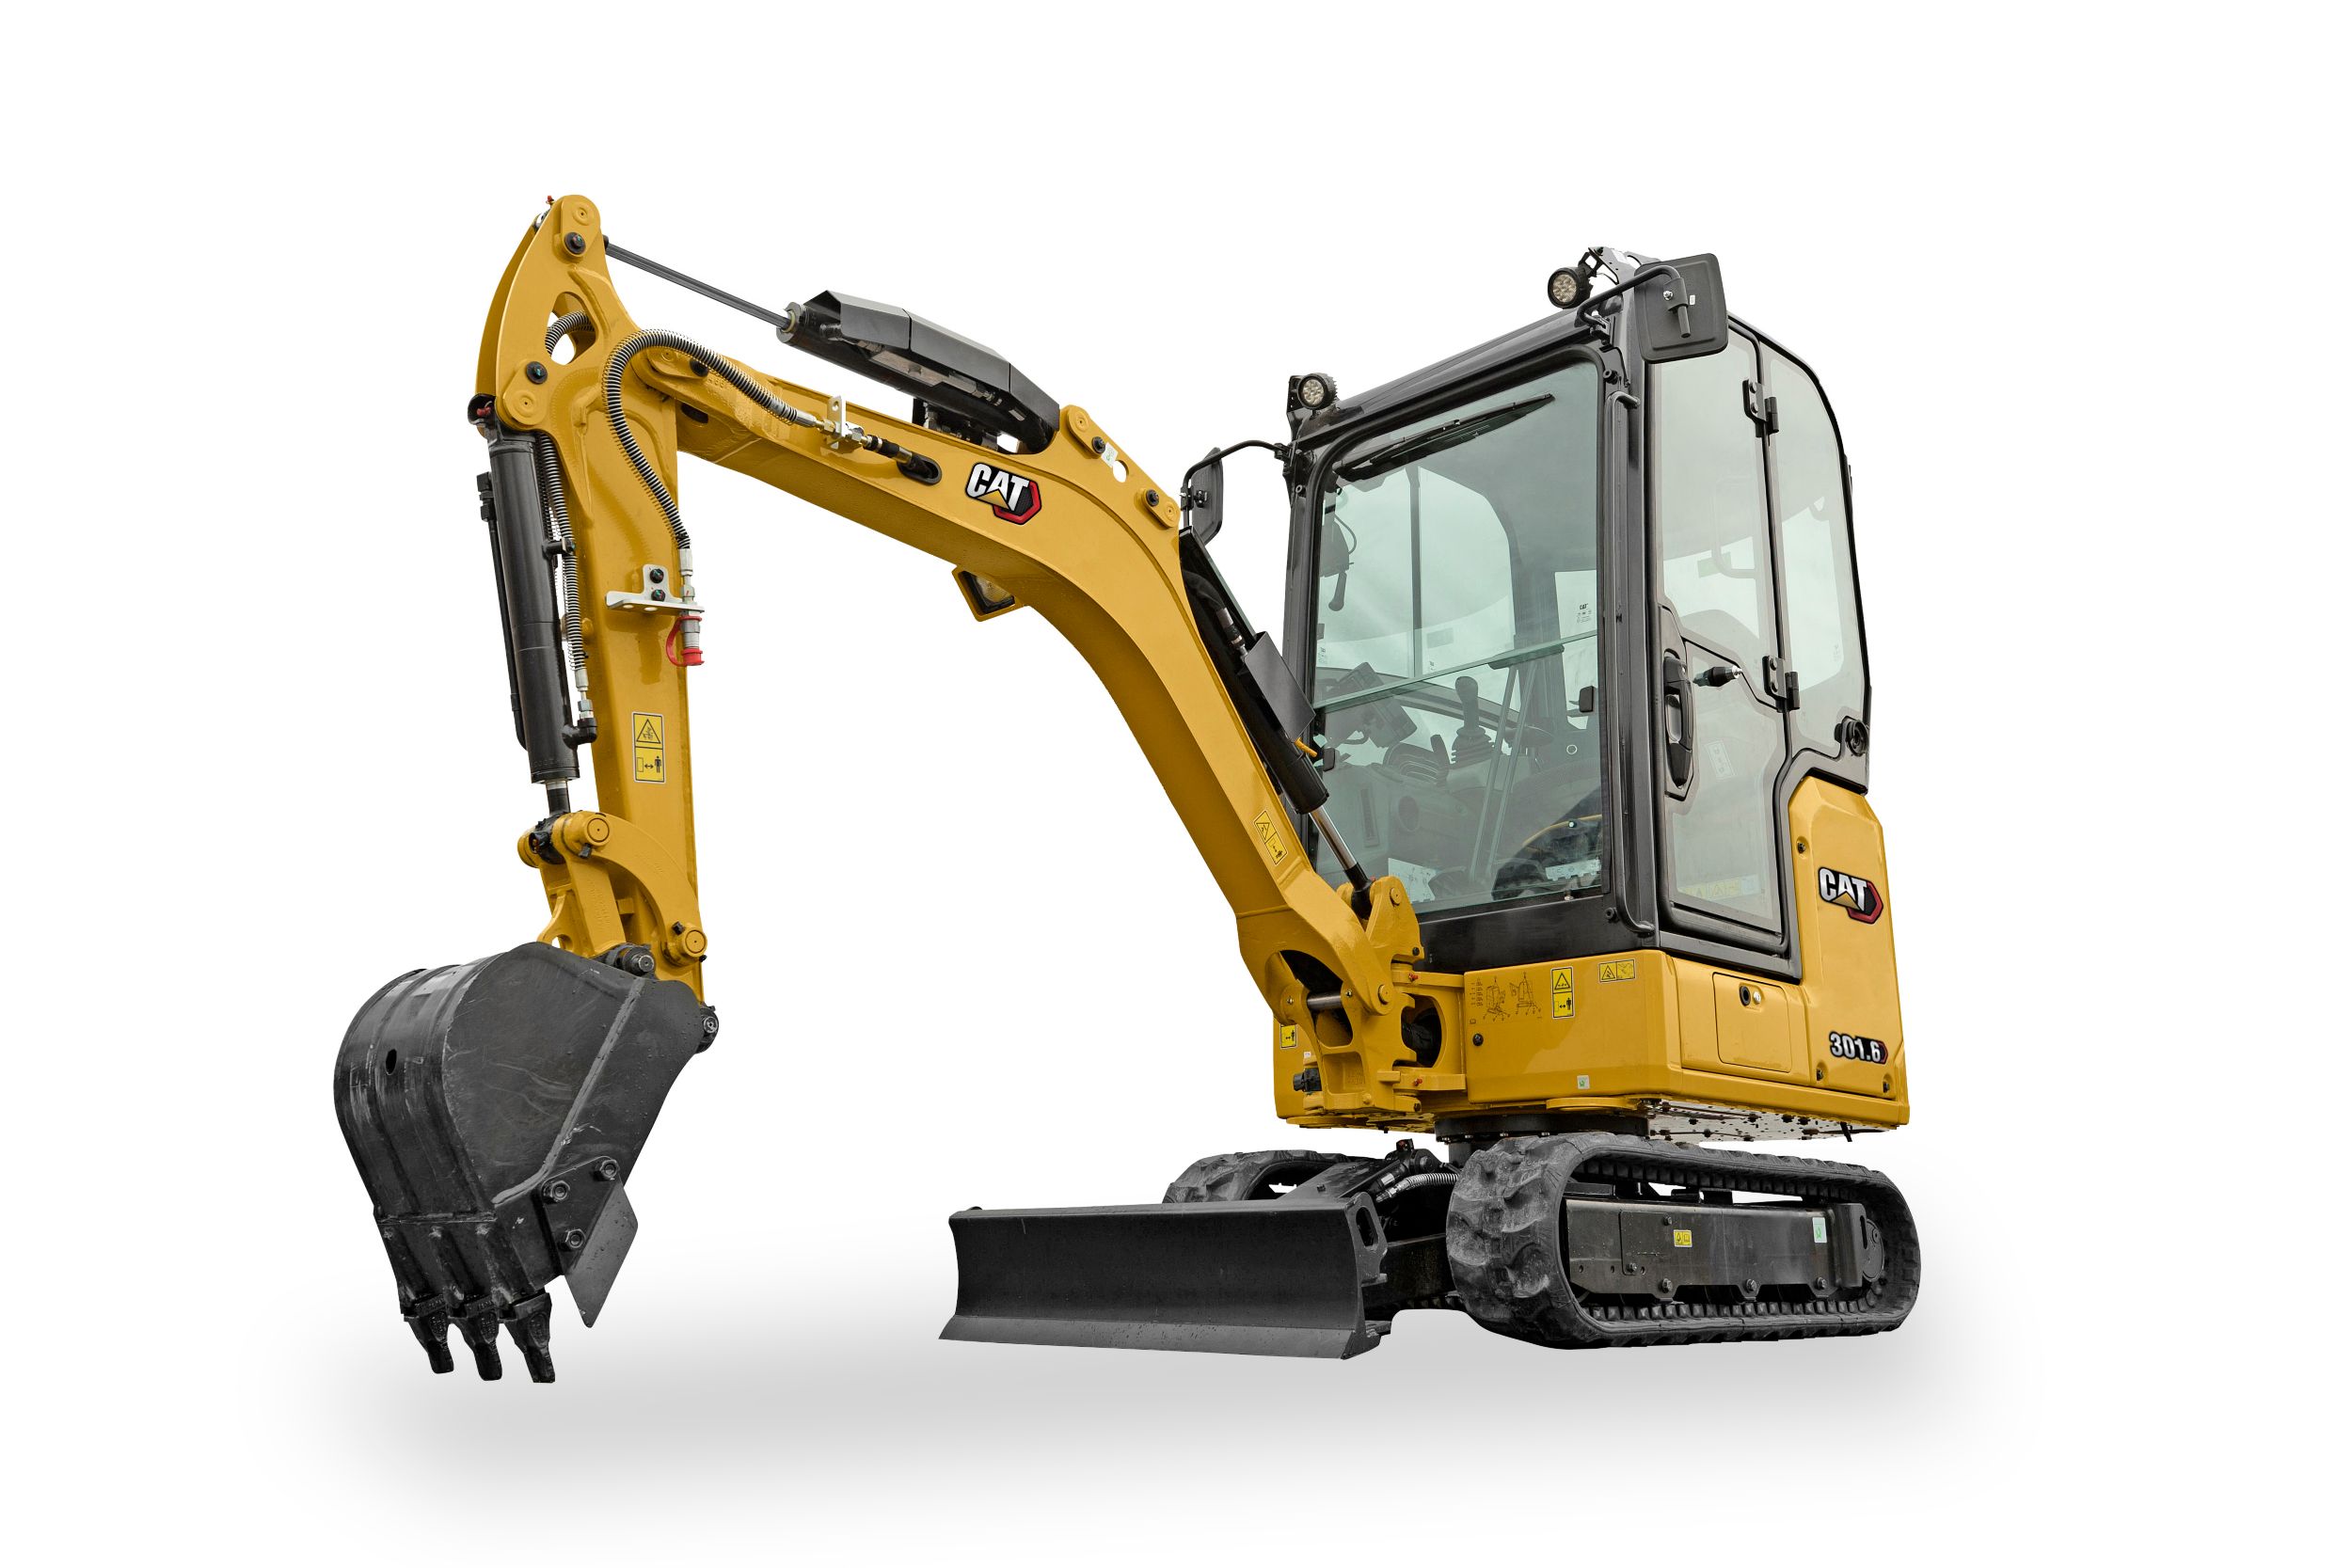
301.6
The Cat® 301.6 Mini Excavator delivers power and performance in a compact size to help you work in a wide range of applications.
Learn More -
- Net Power
- 21 HP
- 15.7 kW
- Operating Weight
- 4222 lb
- 1915 kg
- Dig Depth
- 100 in
- 2540 mm
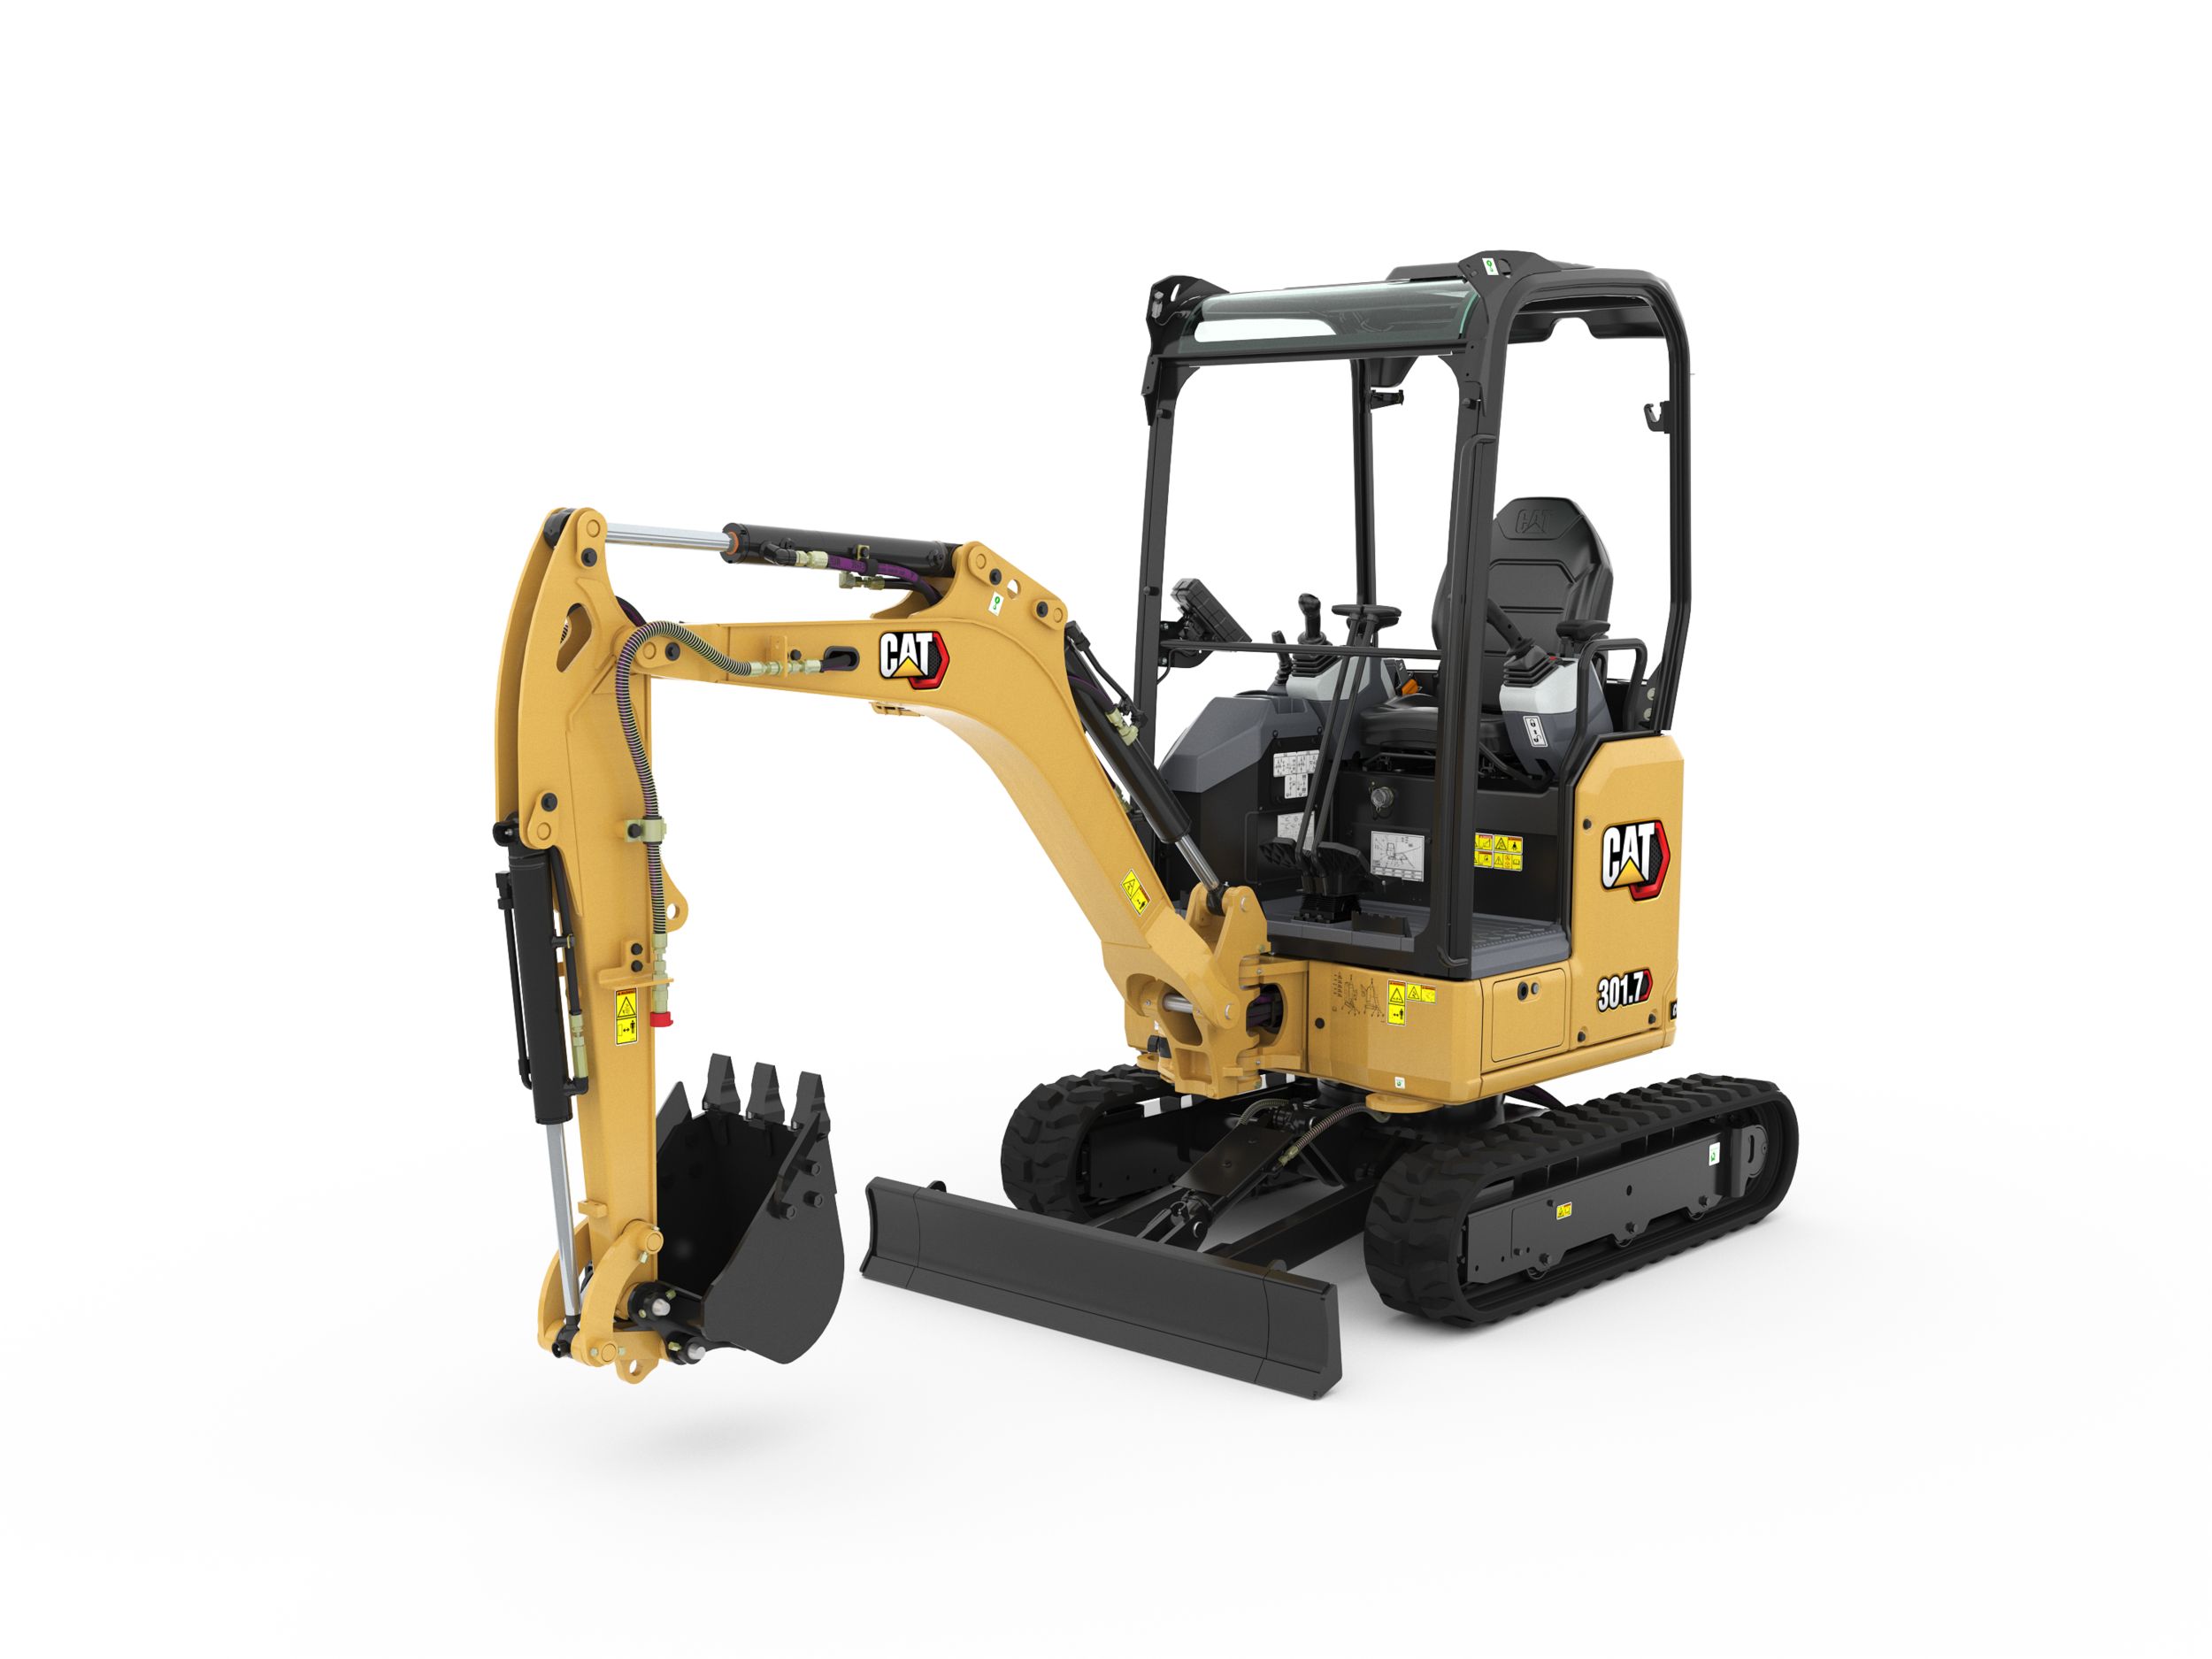
301.7 CR
The Cat® 301.7 CR Mini Excavator delivers power and performance in a compact size to help you work in a wide range of applications.
Learn More -
- Net Power
- 21 HP
- 15.7 kW
- Operating Weight
- 4473 lb
- 2029 kg
- Dig Depth
- 101.2 in
- 2570 mm
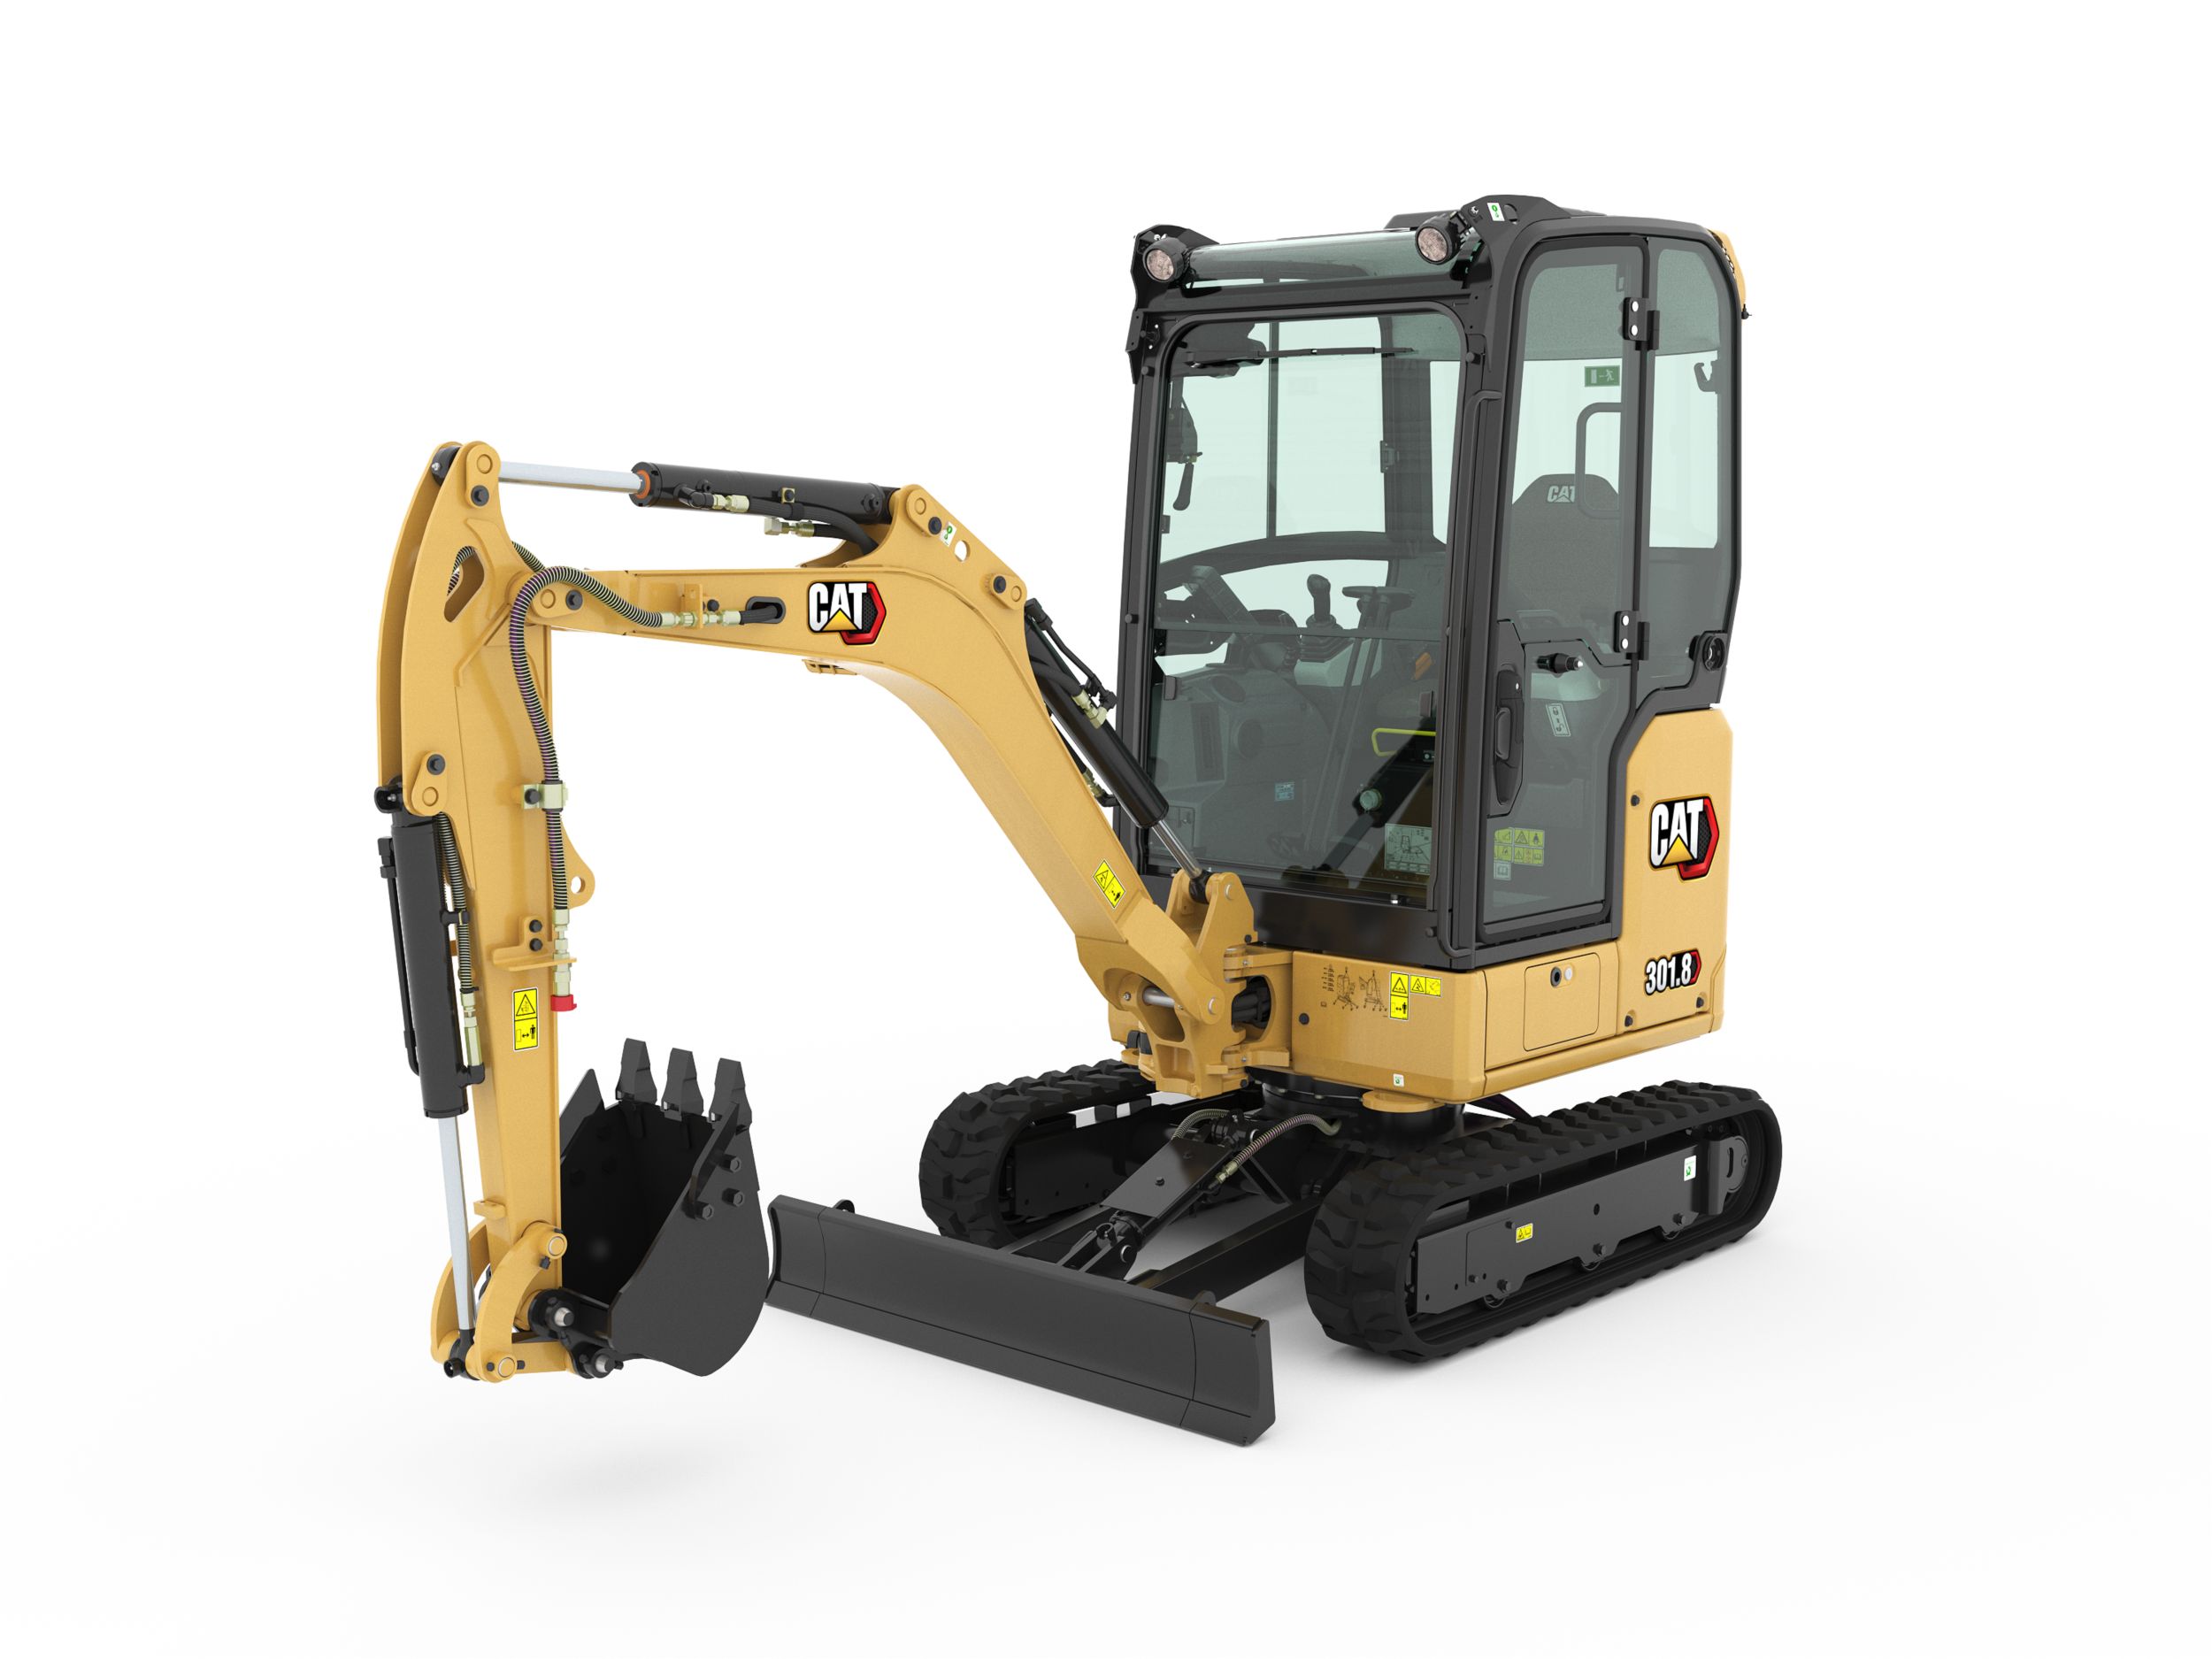
301.8
The Cat® 301.8 Mini Excavator delivers power and performance in a compact size to help you work in a wide range of applications.
Learn More -
- Net Power
- 21 HP
- 15.7 kW
- Operating Weight
- 4987 lb
- 2262 kg
- Dig Depth
- 101.2 in
- 2570 mm
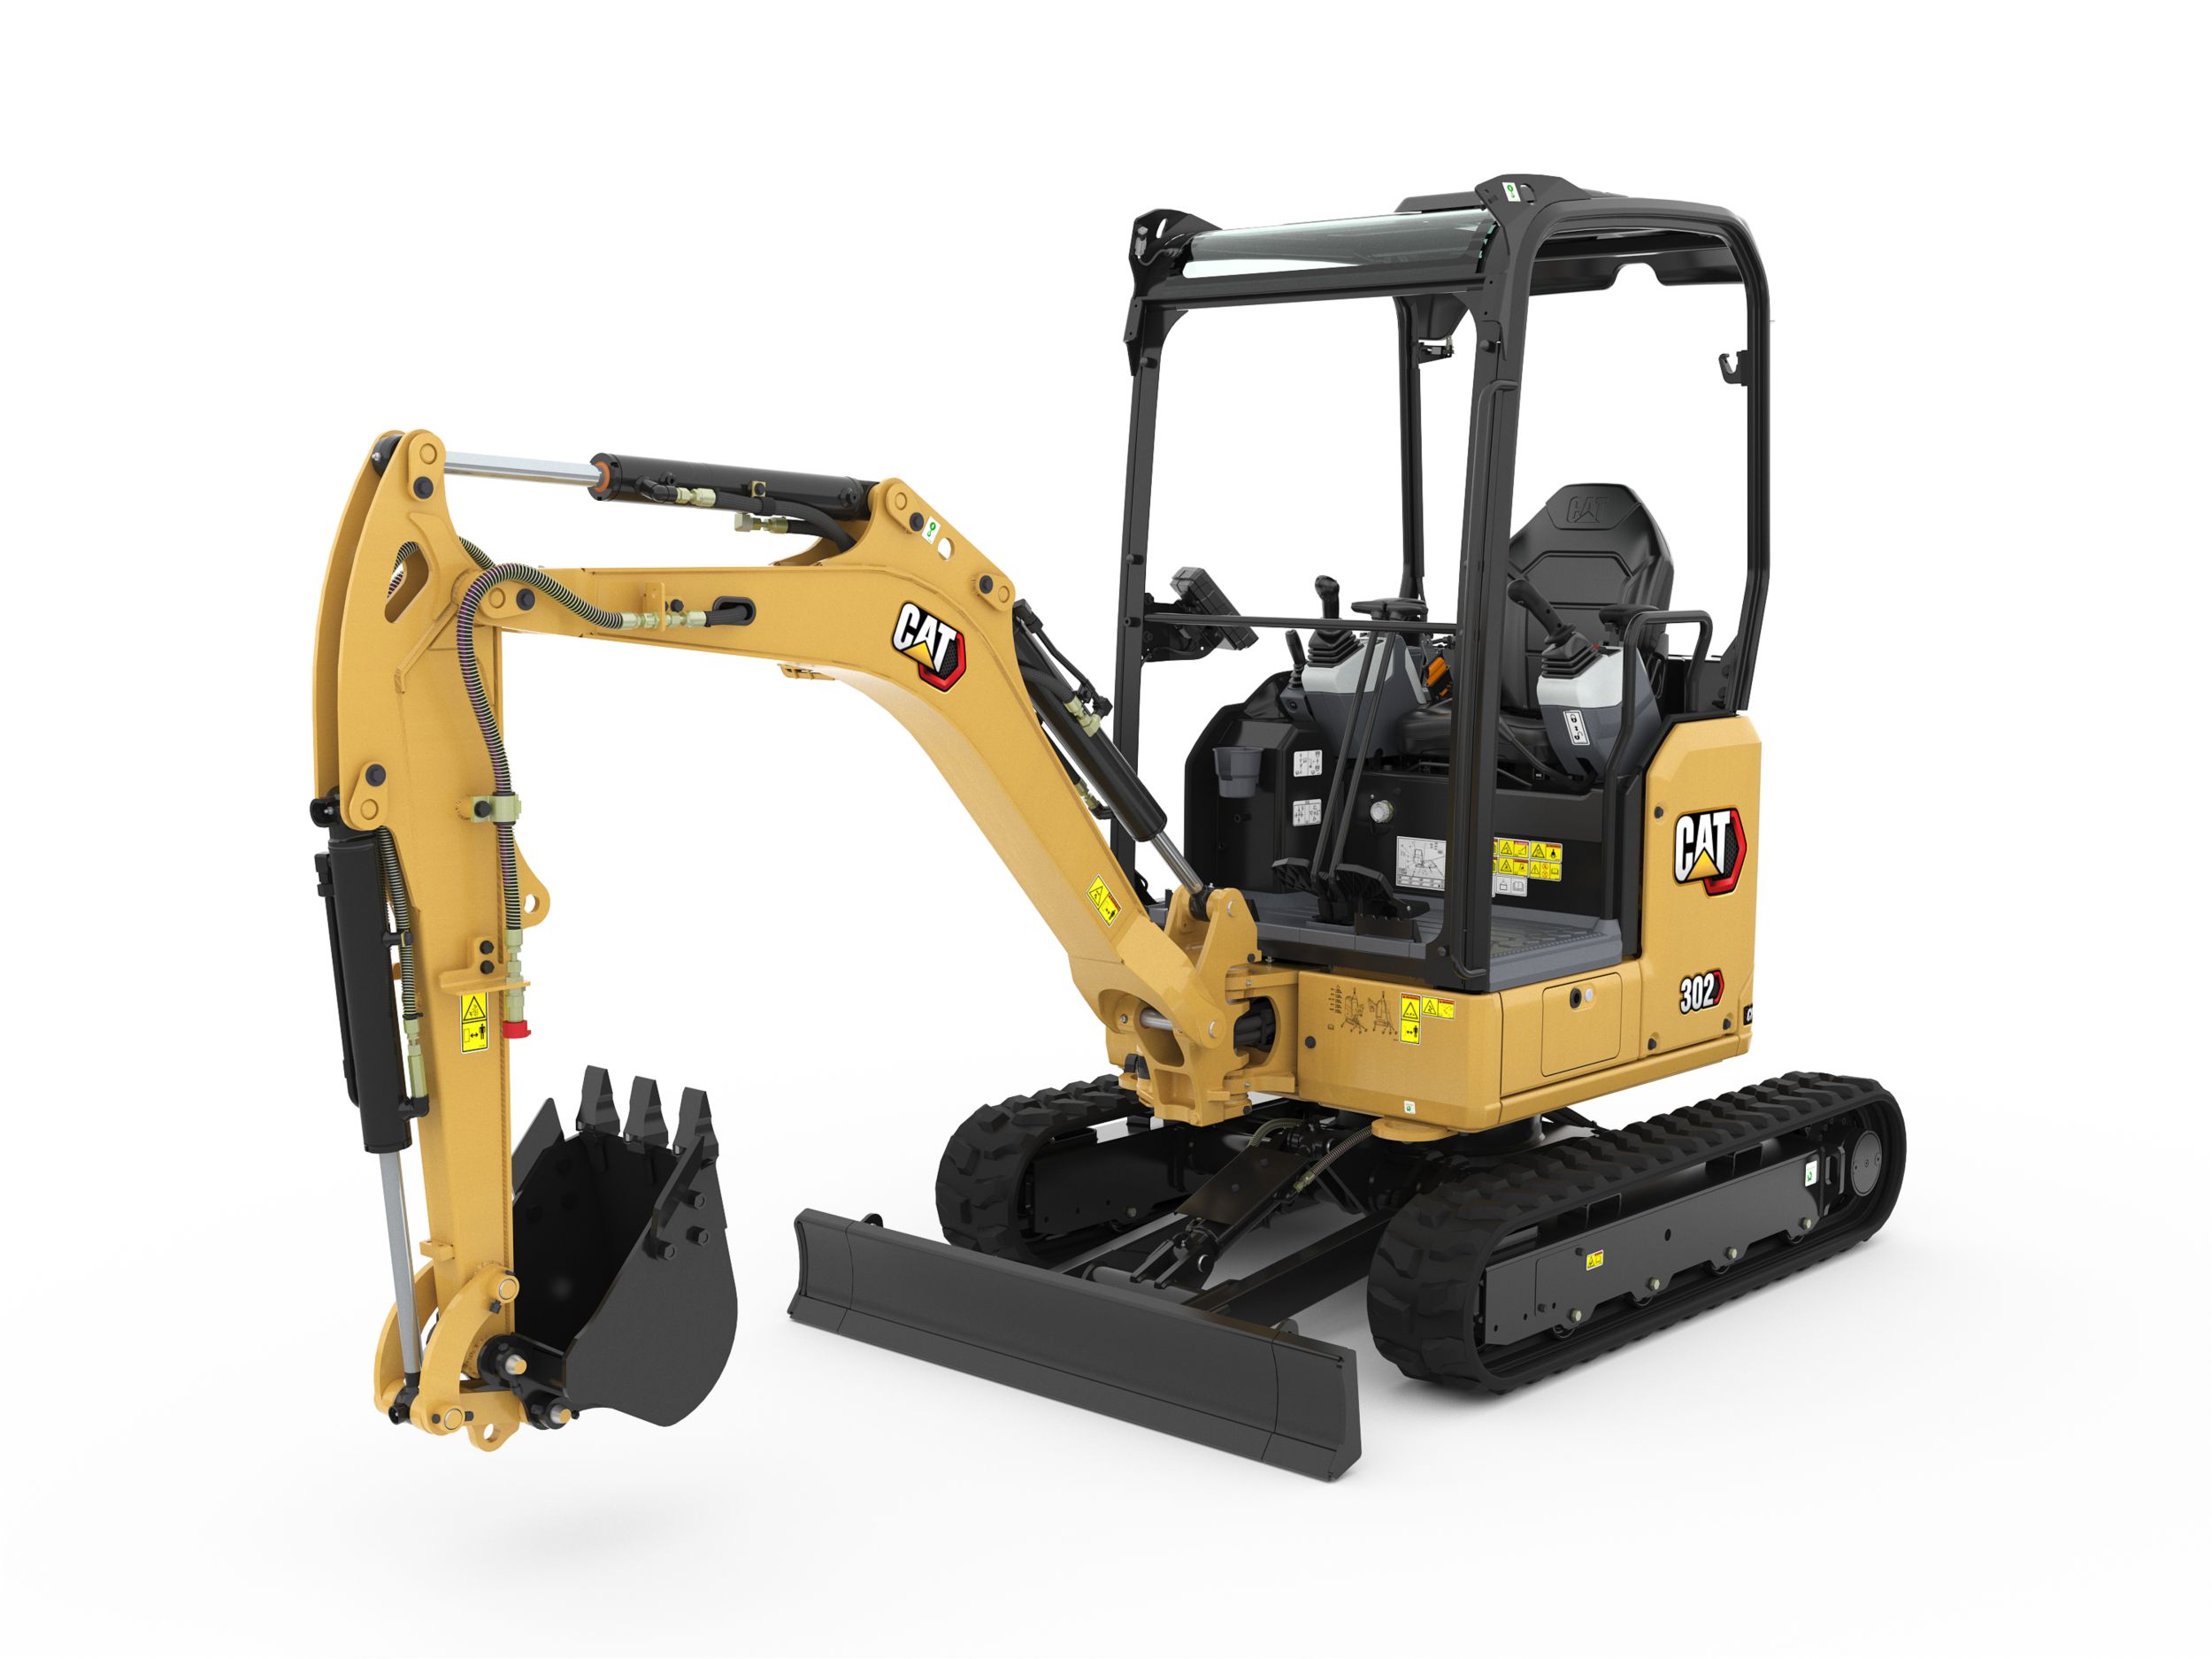
302 CR
The Cat® 302 CR Mini Excavator delivers power and performance in a compact size to help you work in a wide range of applications.
Learn More -
- Net Power
- 23.6 HP
- 17.6 kW
- Operating Weight
- 6725 lb
- 3050 kg
- Dig Depth
- 106.7 in
- 2710 mm
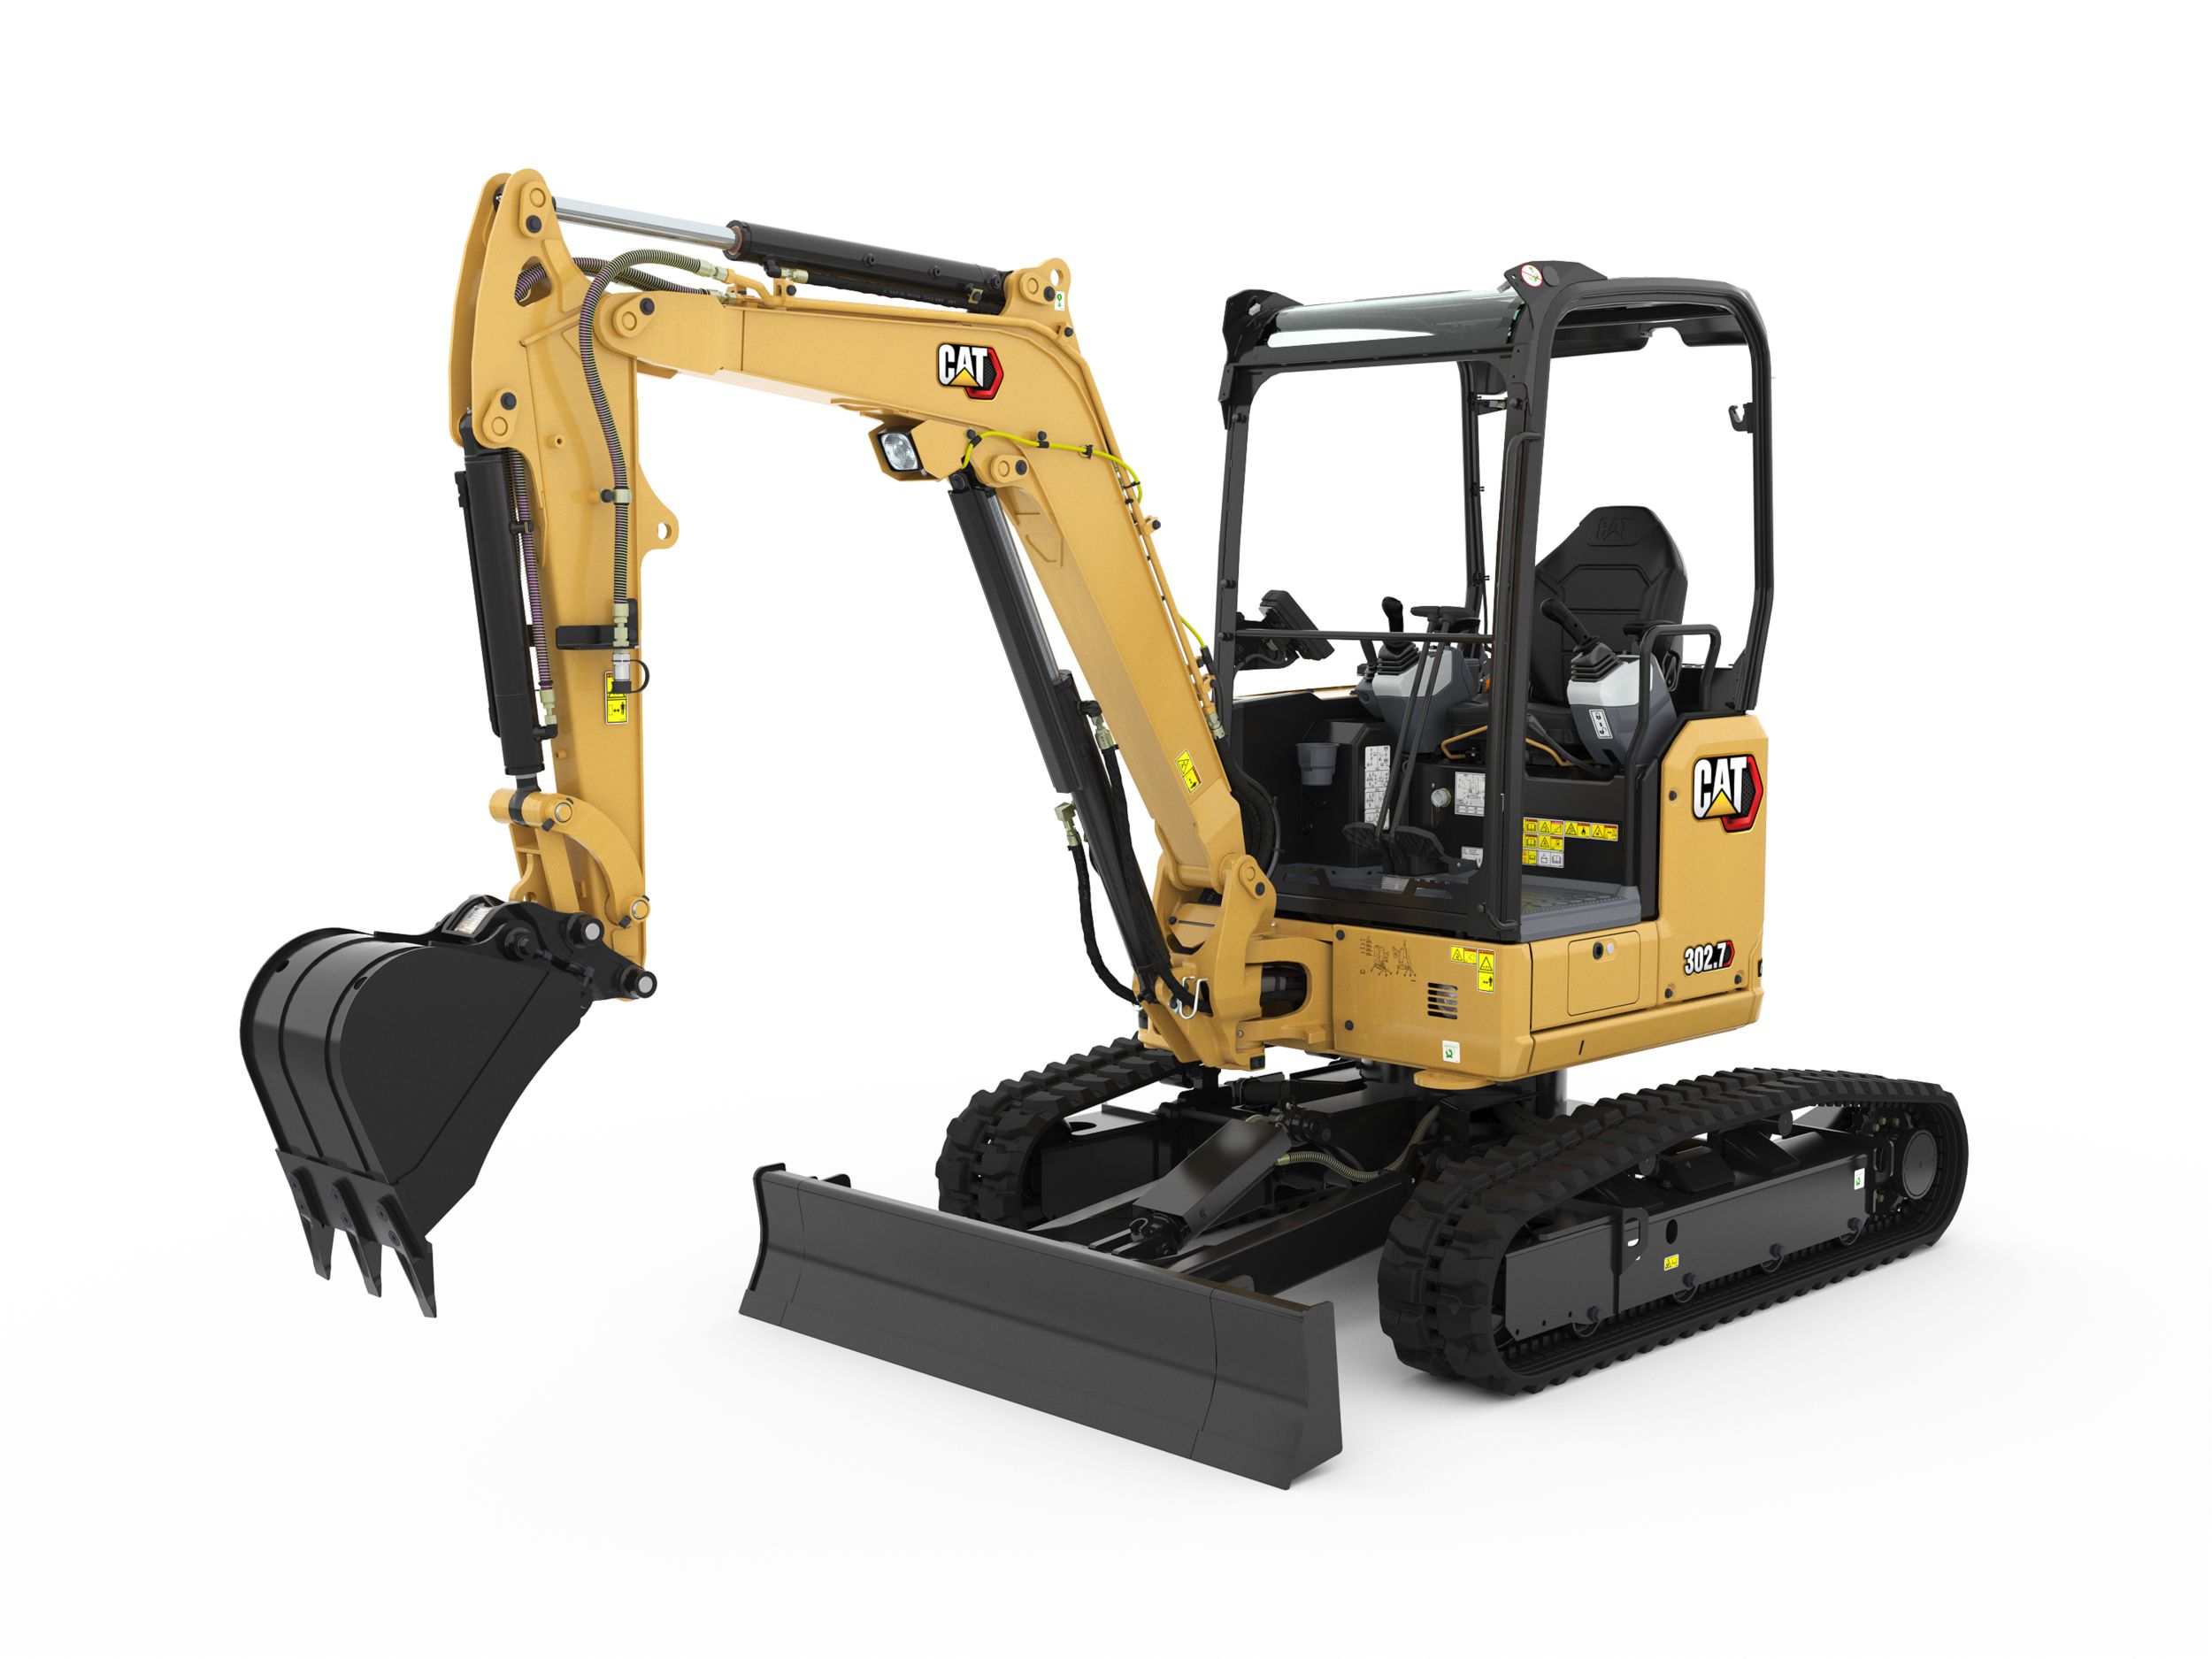
302.7 CR
The Cat® 302.7 CR Mini Excavator delivers power and performance in a compact size to help you work in a wide range of applications.
Learn More -
- Net Power
- 23.6 HP
- 17.6 kW
- Operating Weight
- 7817 lb
- 3545 kg
- Dig Depth
- 116.1 in
- 2950 mm
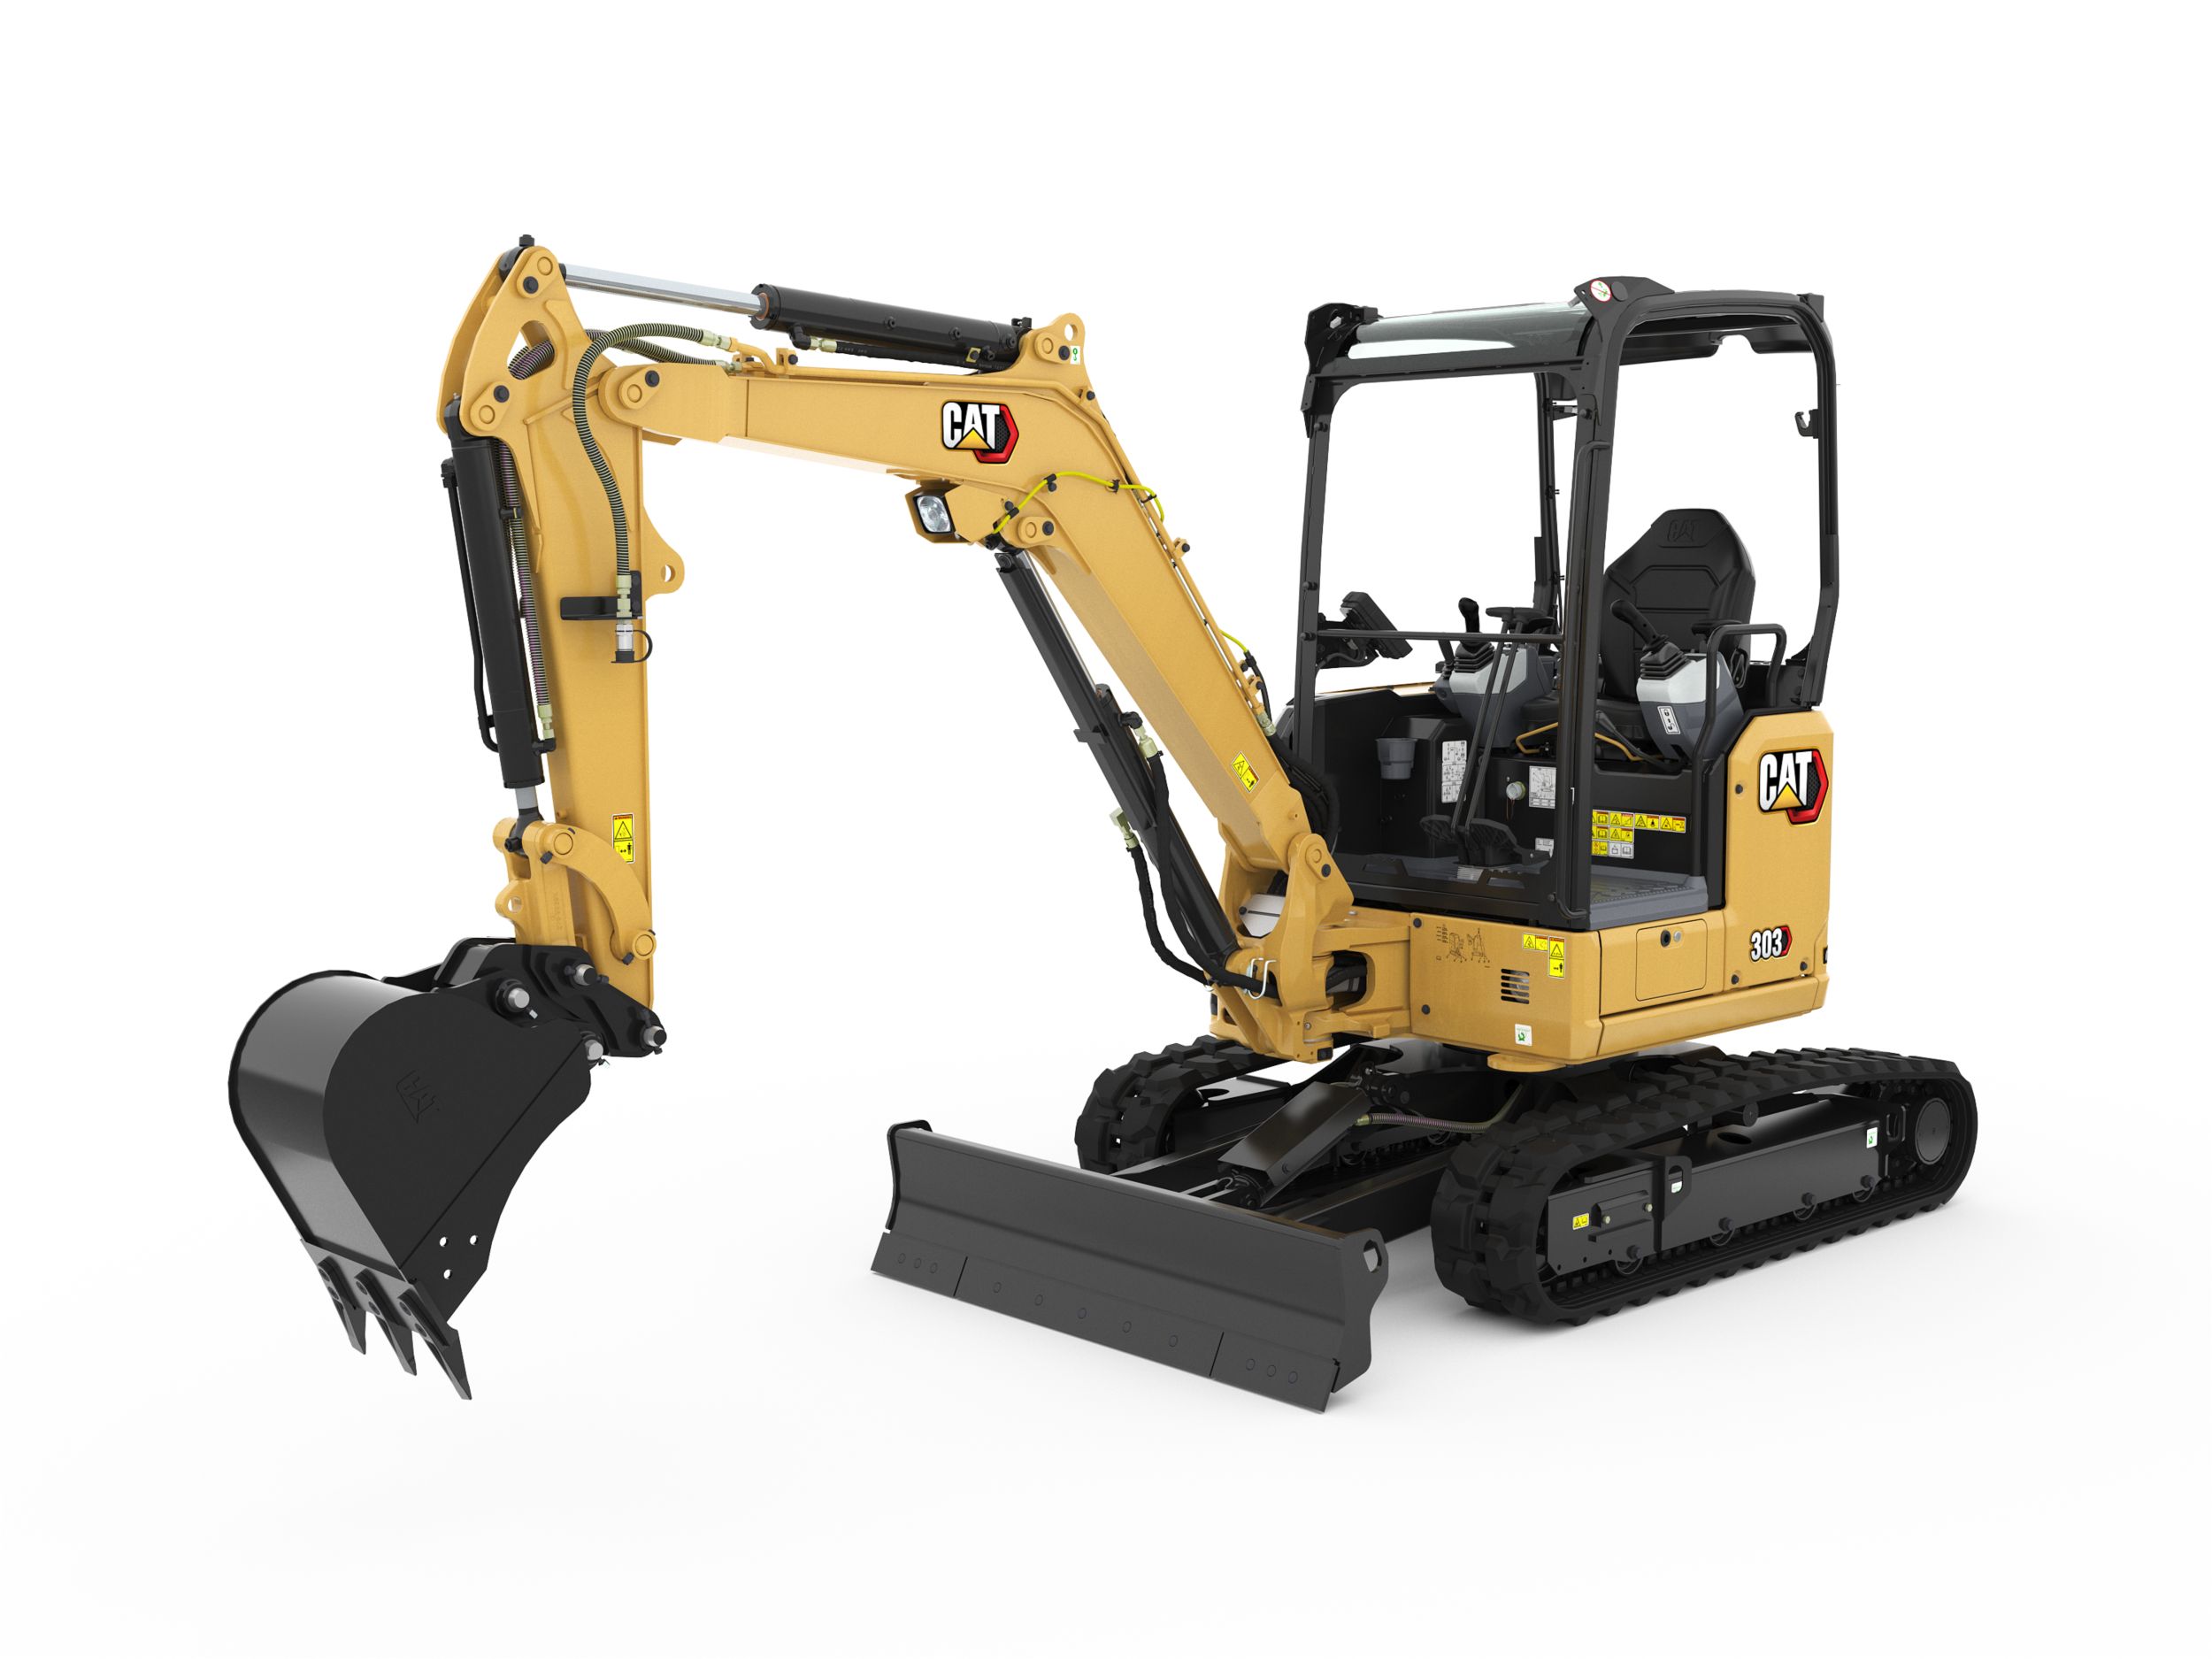
303 CR
The Cat® 303 CR Mini Excavator delivers power and performance in a compact size to help you work in a wide range of applications.
Learn More -
- Net Power
- 23.6 HP
- 17.6 kW
- Operating Weight
- 9239 lb
- 4190 kg
- Dig Depth
- 122.4 in
- 3110 mm
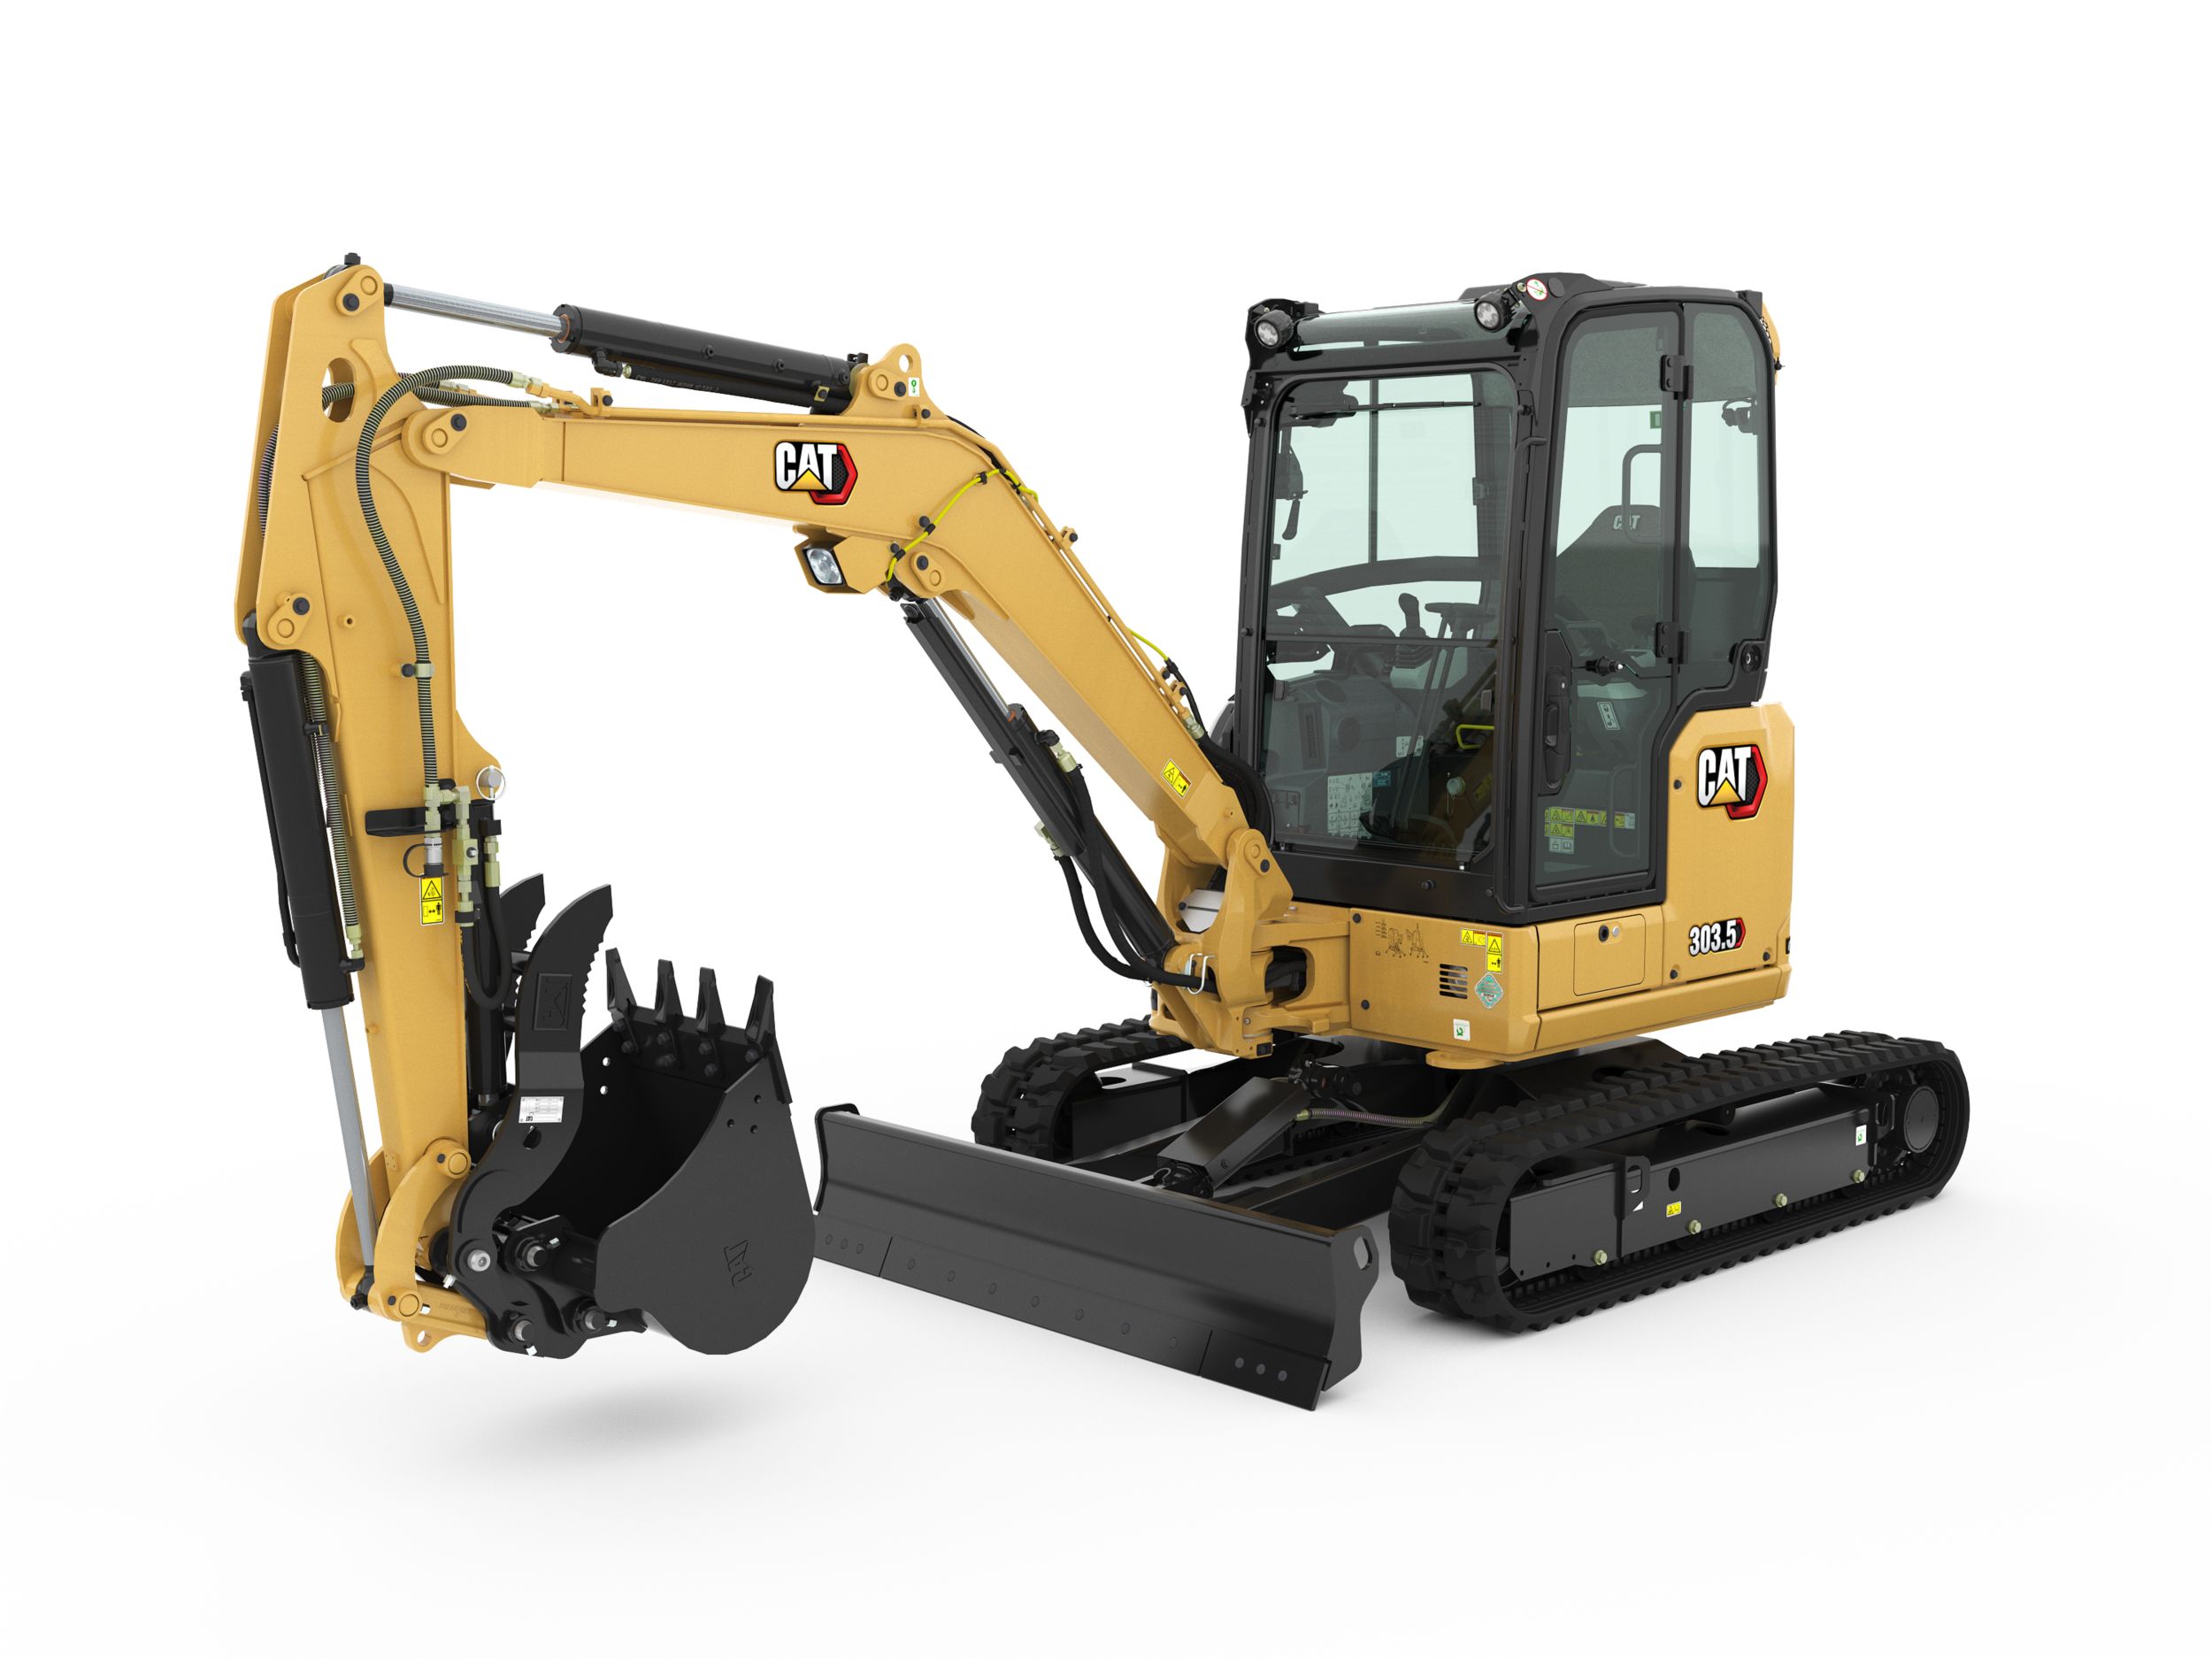
303.5 CR
The Cat® 303.5 CR Mini Excavator delivers power and performance in a compact size to help you work in a wide range of applications.
Learn More -
- Net Power
- 45 HP
- 33.6 kW
- Operating Weight
- 9867 lb
- 4475 kg
- Dig Depth
- 138.2 in
- 3510 mm
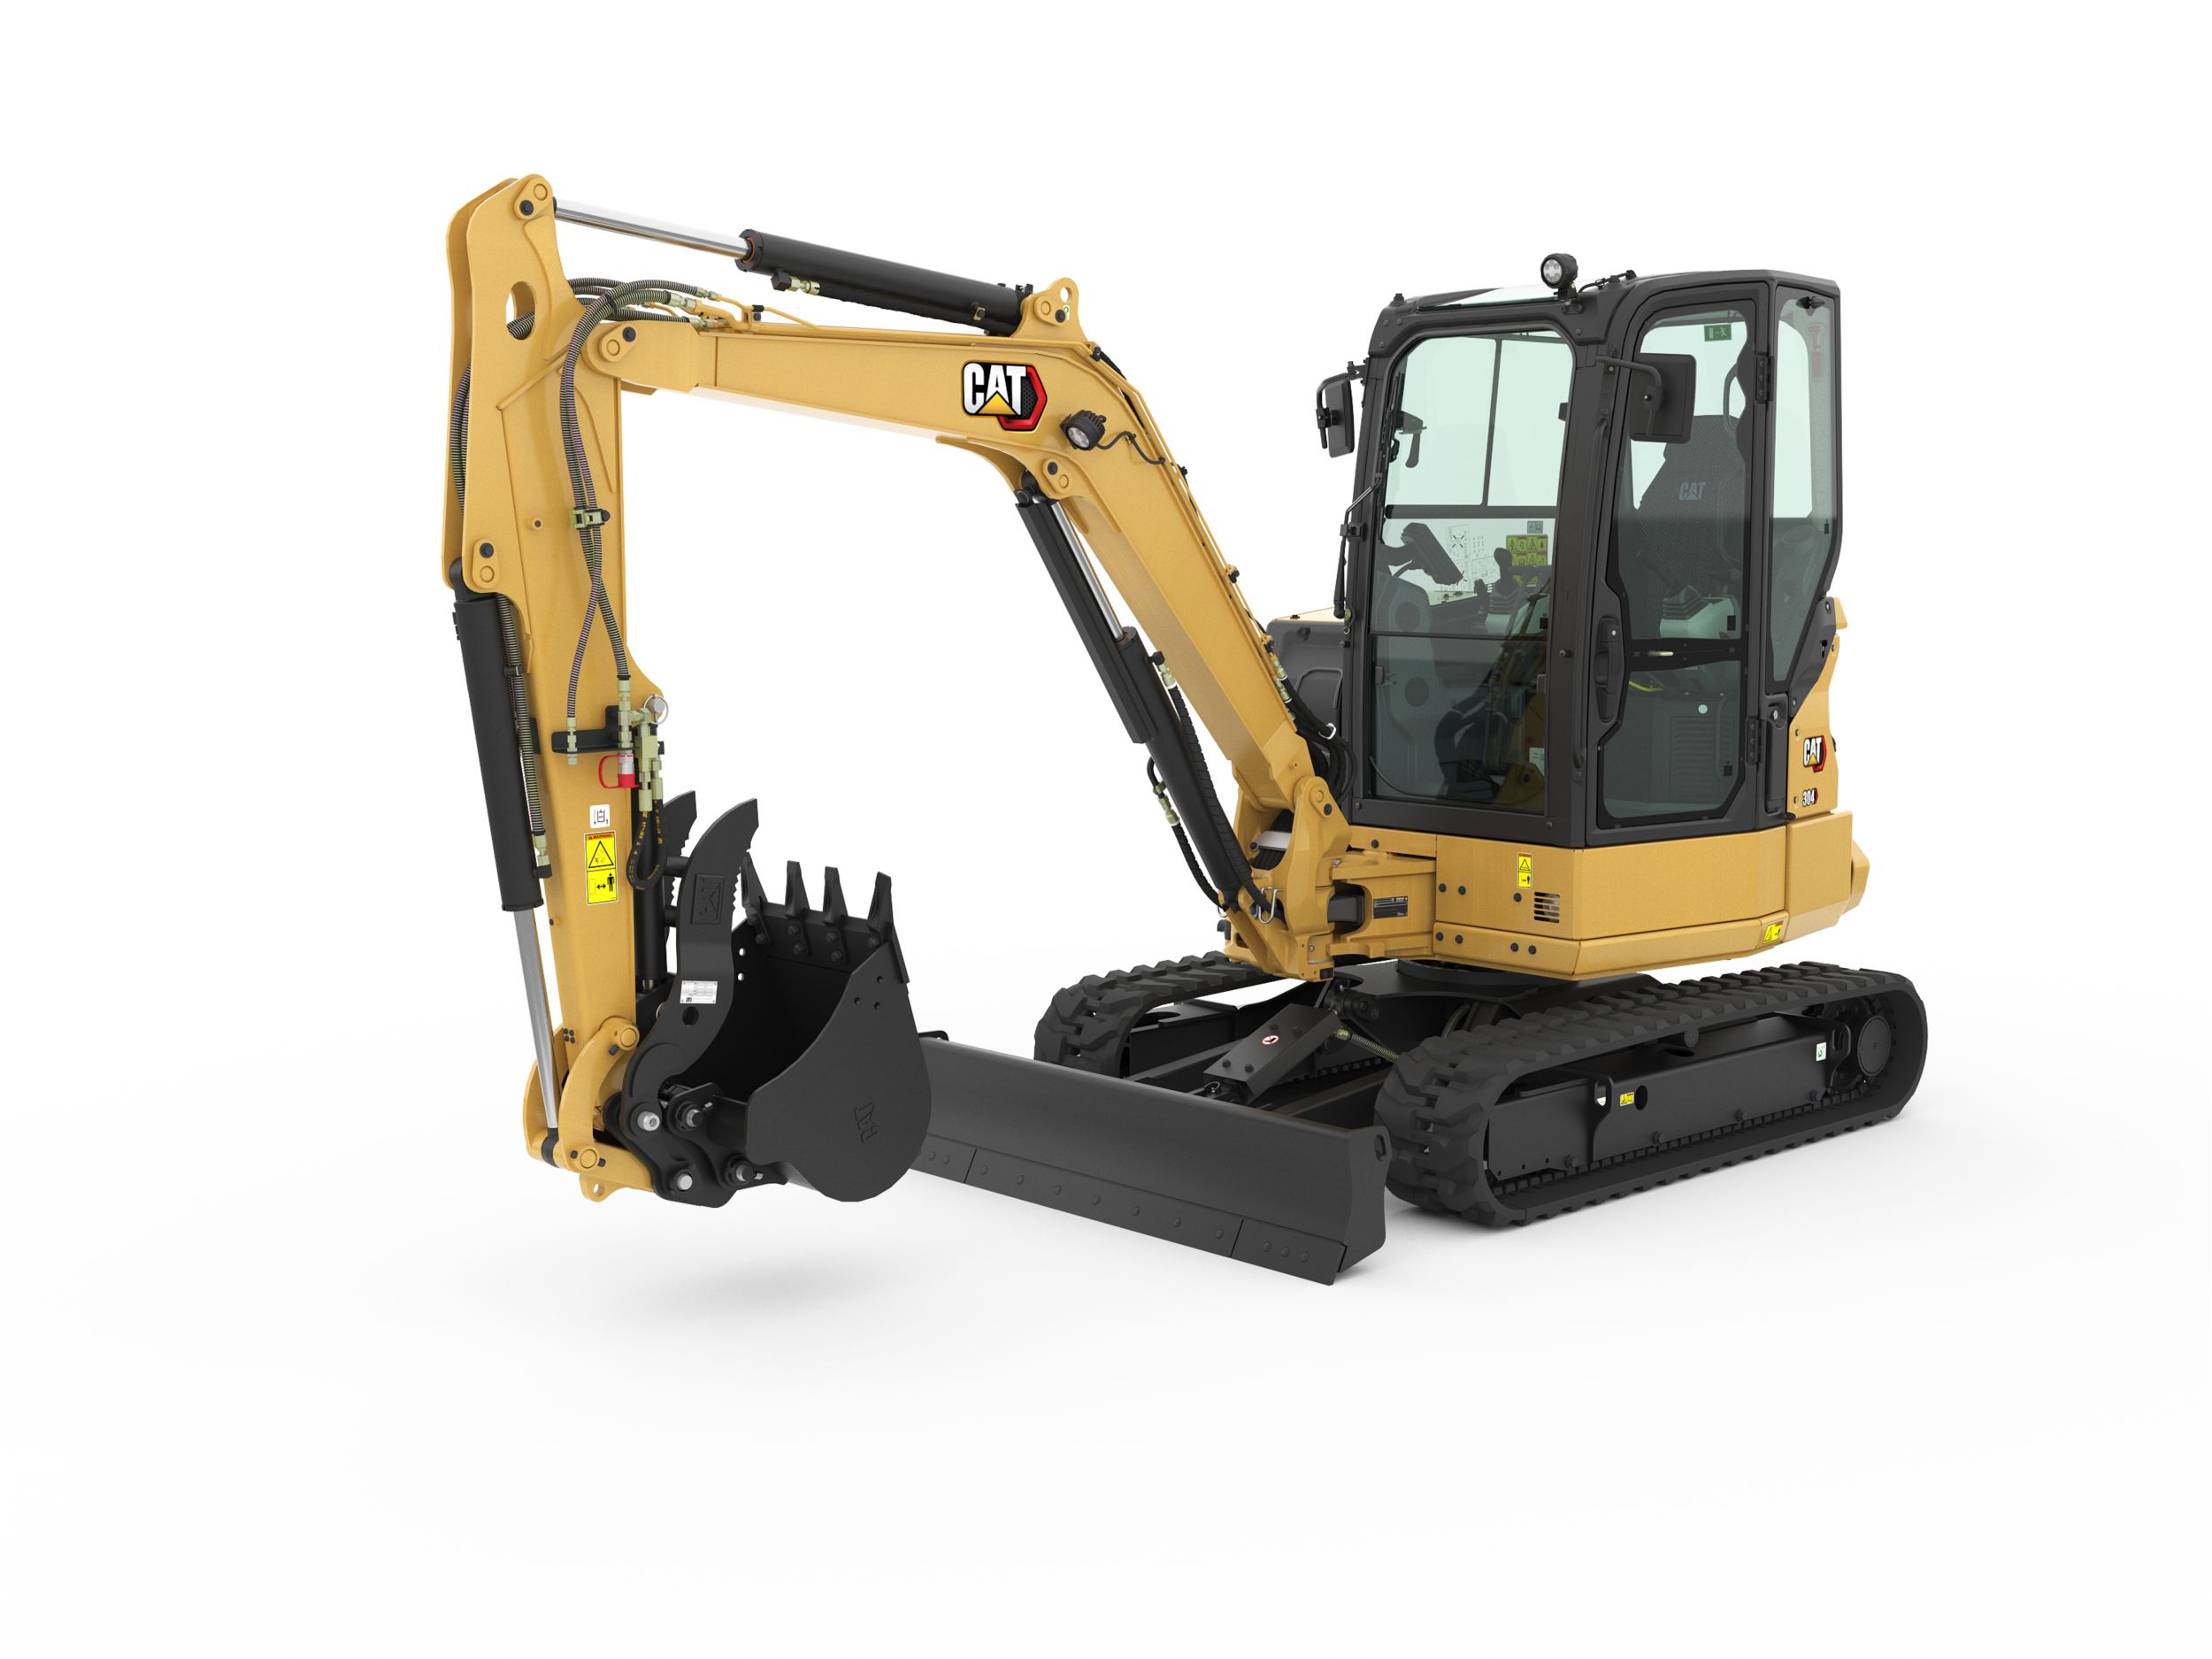
304
The Cat® 304 Mini Excavator delivers power and performance in a compact size to help you work in a wide range of applications.
Learn More -
- Net Power
- 45 HP
- 33.6 kW
- Operating Weight
- 12688 lb
- 5754 kg
- Dig Depth
- 144.5 in
- 3670 mm
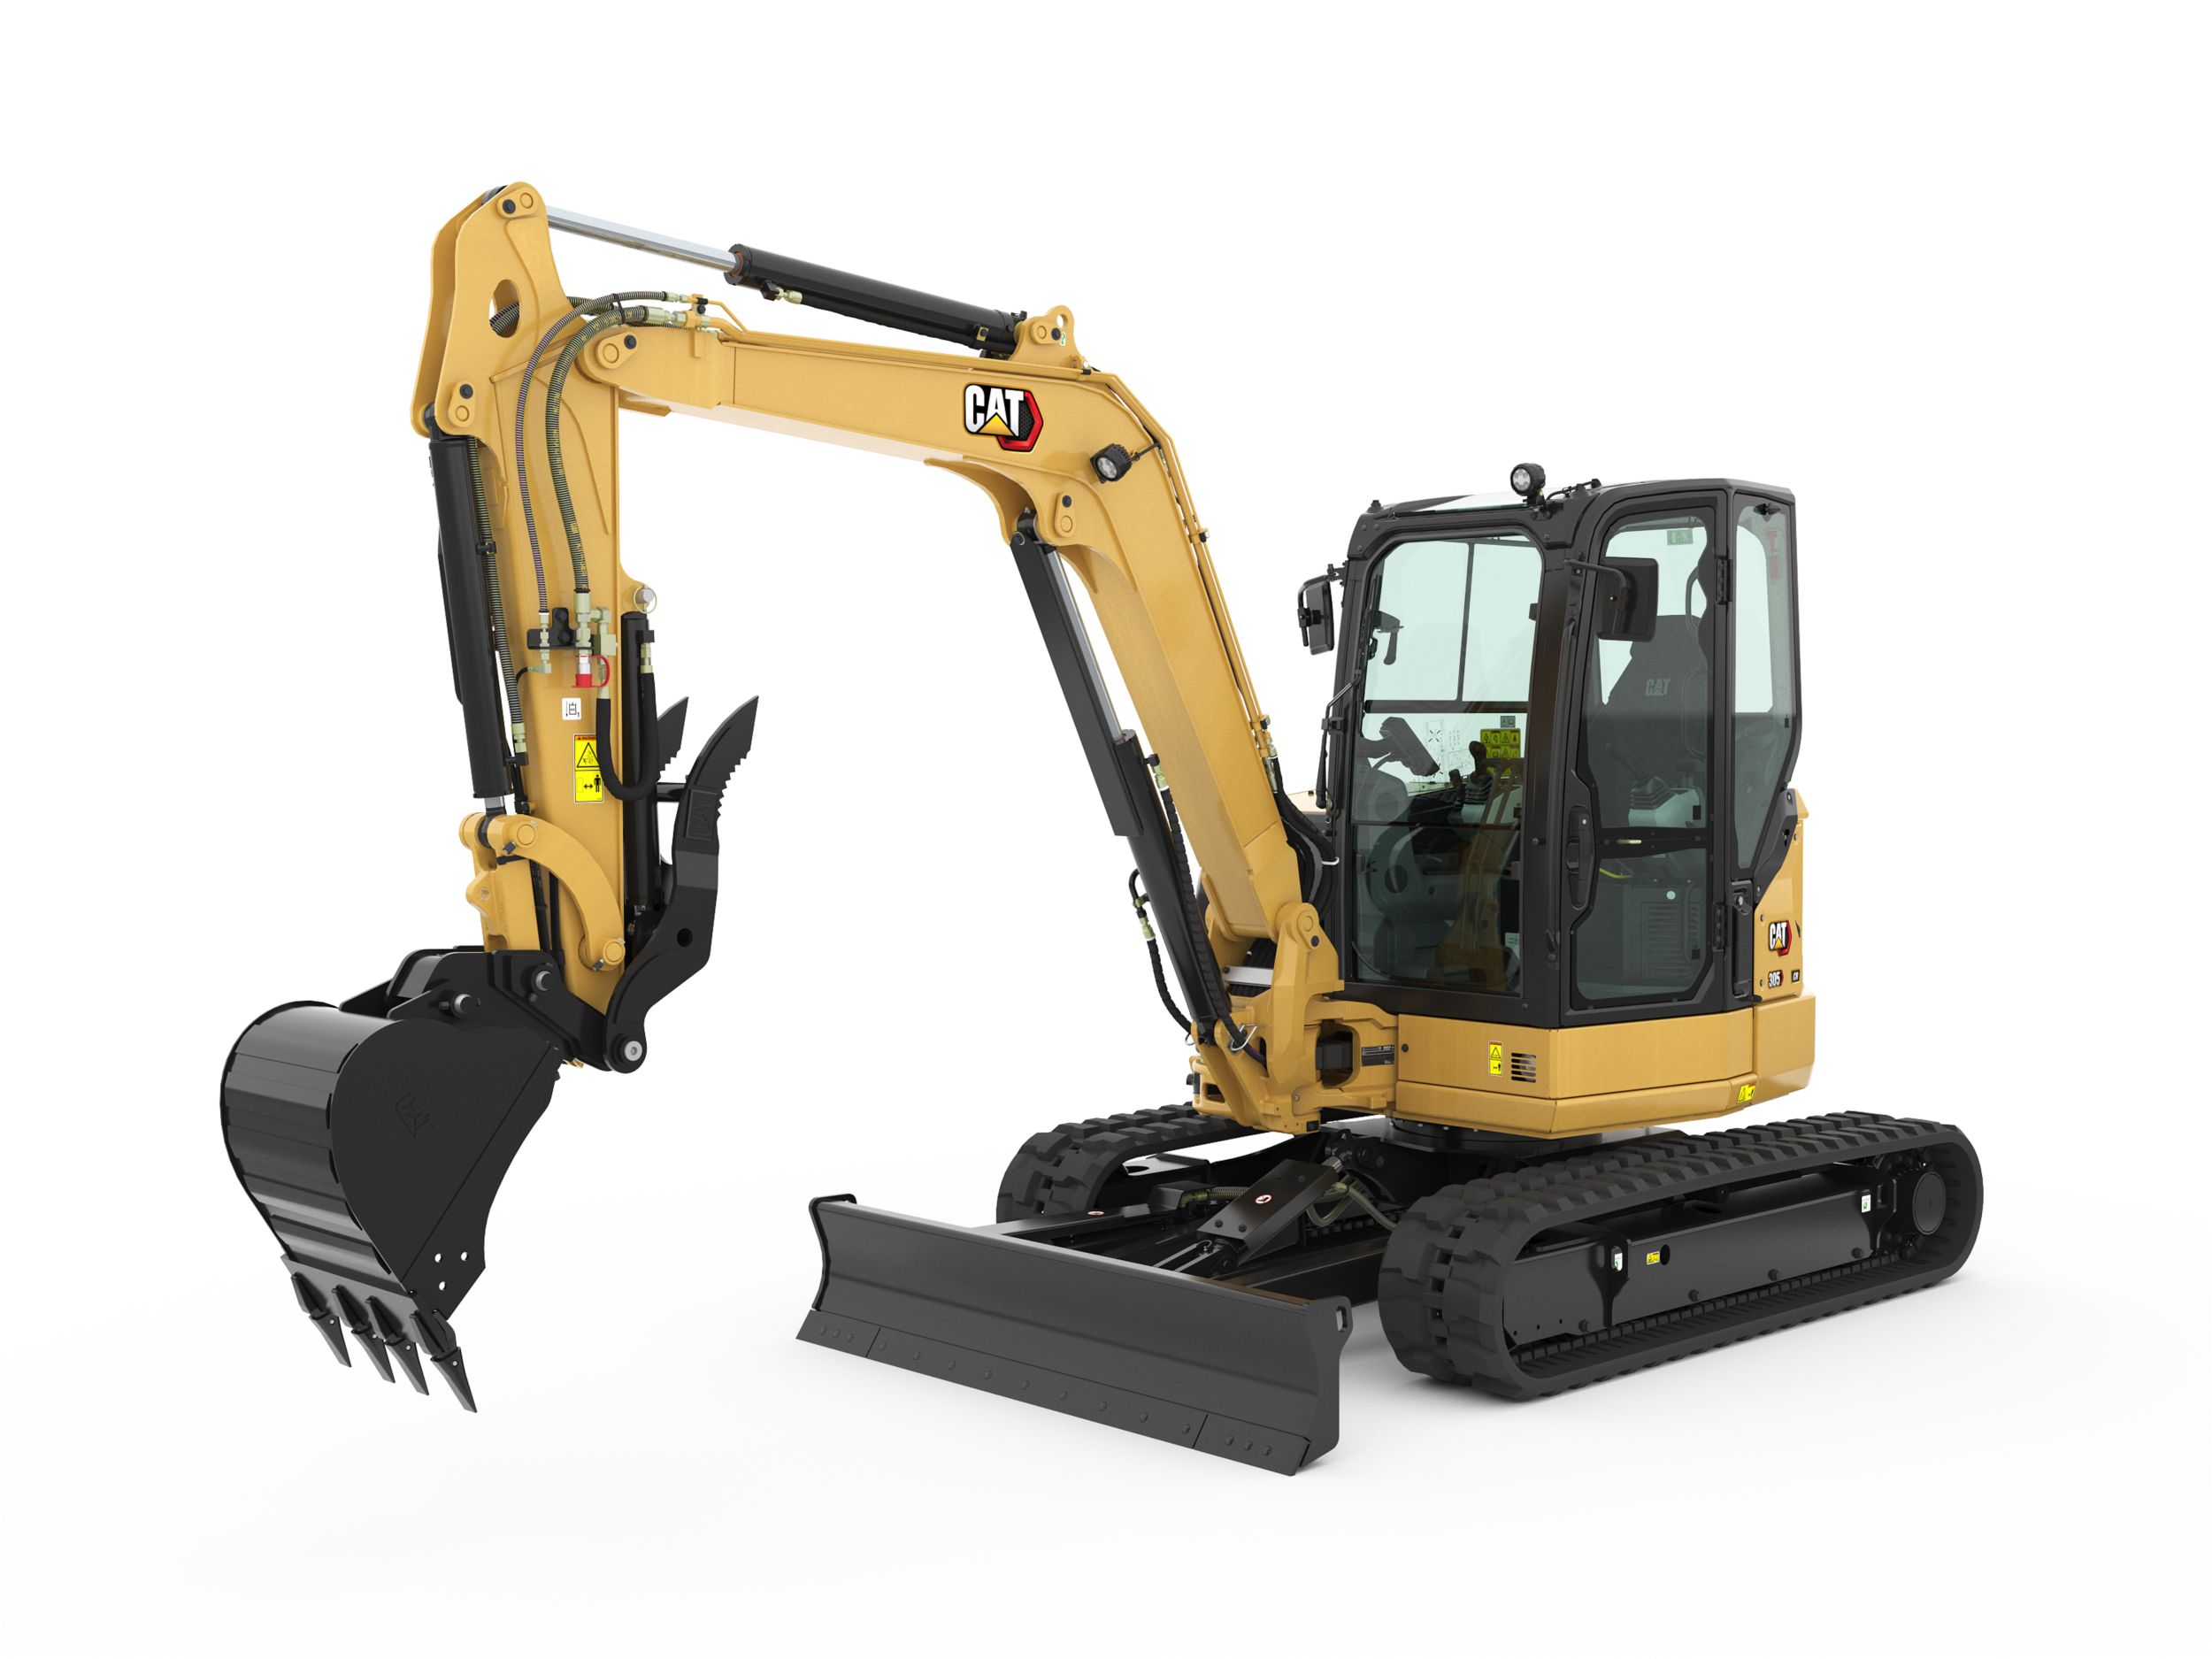
305 CR
The Cat® 305 CR Mini Excavator delivers power and performance in a compact size to help you work in a wide range of applications.
Learn More -
- Net Power
- 55.9 HP
- 41.7 kW
- Operating Weight
- 15766 lb
- 7150 kg
- Dig Depth
- 162 in
- 4110 mm
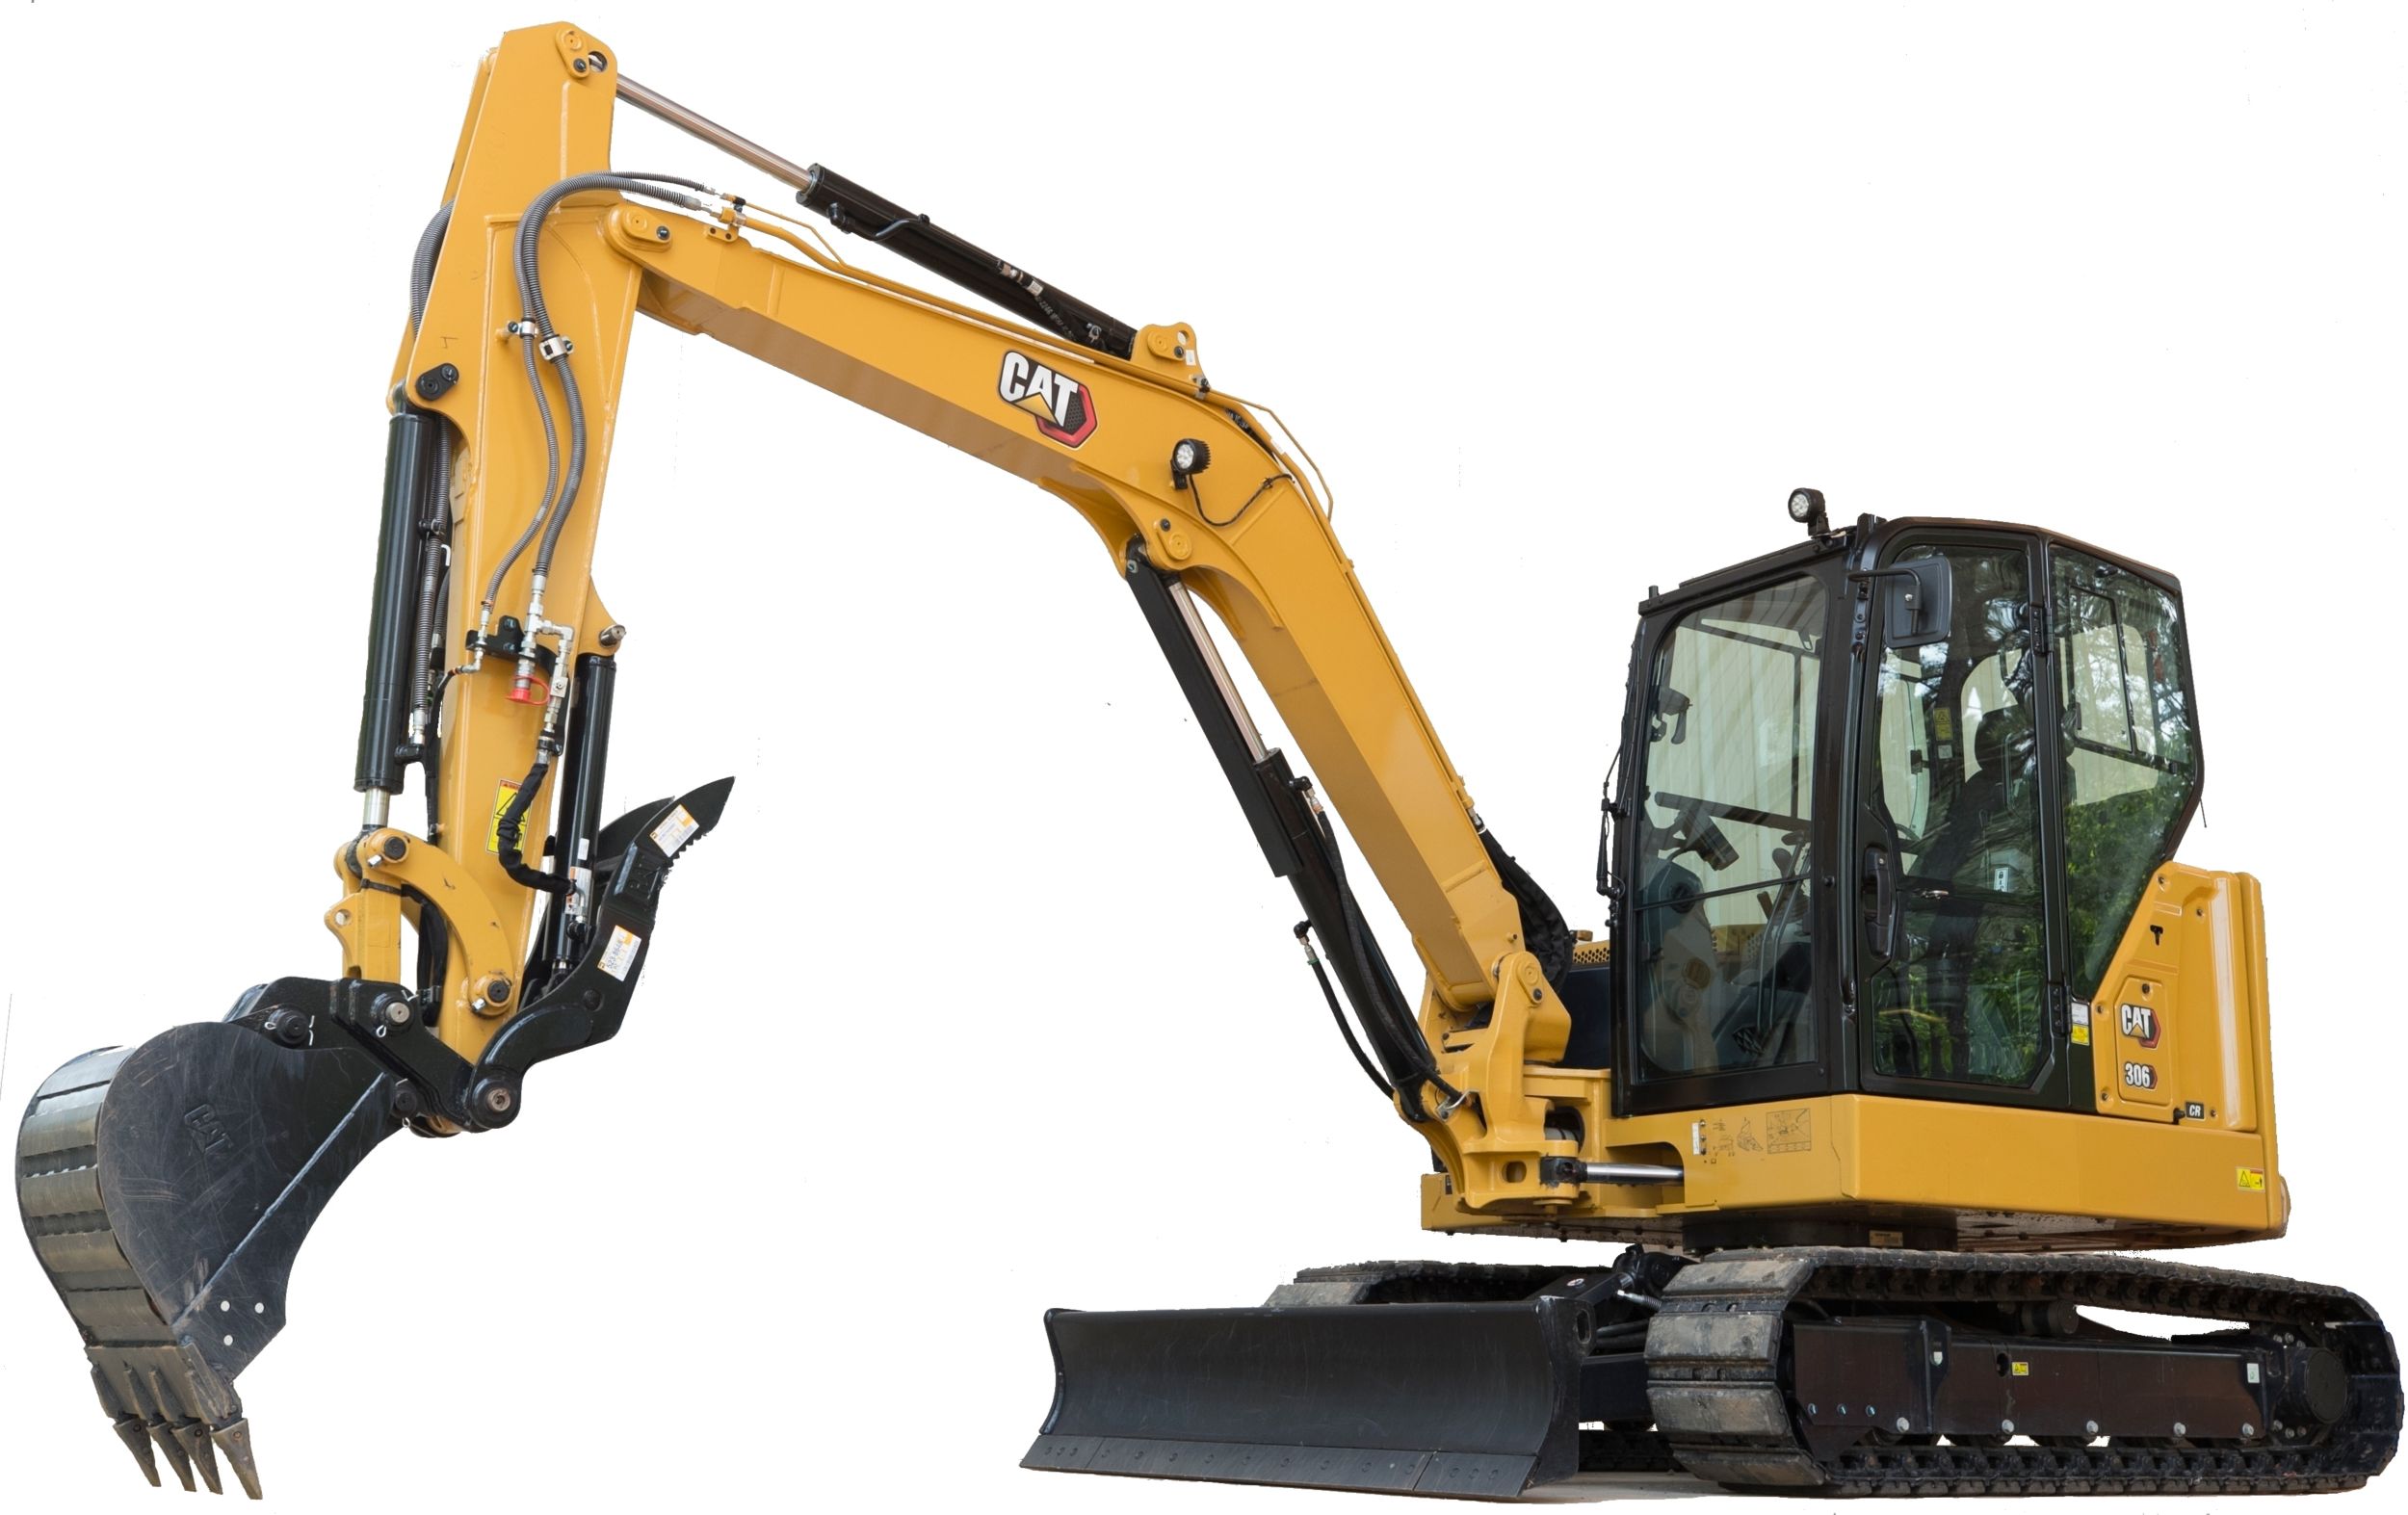
306 CR
The Cat® 306 CR Mini Excavator delivers maximum power and performance in a mini size to help you work in a wide range of applications.
Learn More -
- Net Power
- 55.9 HP
- 41.7 kW
- Operating Weight
- 15766 lb
- 7150 kg
- Dig Depth
- 117.1 in
- 2975 mm
306 CR VAB
The Cat® 306 CR Variable Angle Boom (VAB) Mini Excavator delivers maximum power and performance in a mini size to help you work in a wide range of applications. The Variable Angle Boom provides the maximum in linkage flexibility in tight applications.
Learn More -
- Net Power
- 54.8 HP
- 40.9 kW
- Operating Weight
- 17905 lb
- 8120 kg
- Dig Depth
- 182.8 in
- 4642 mm
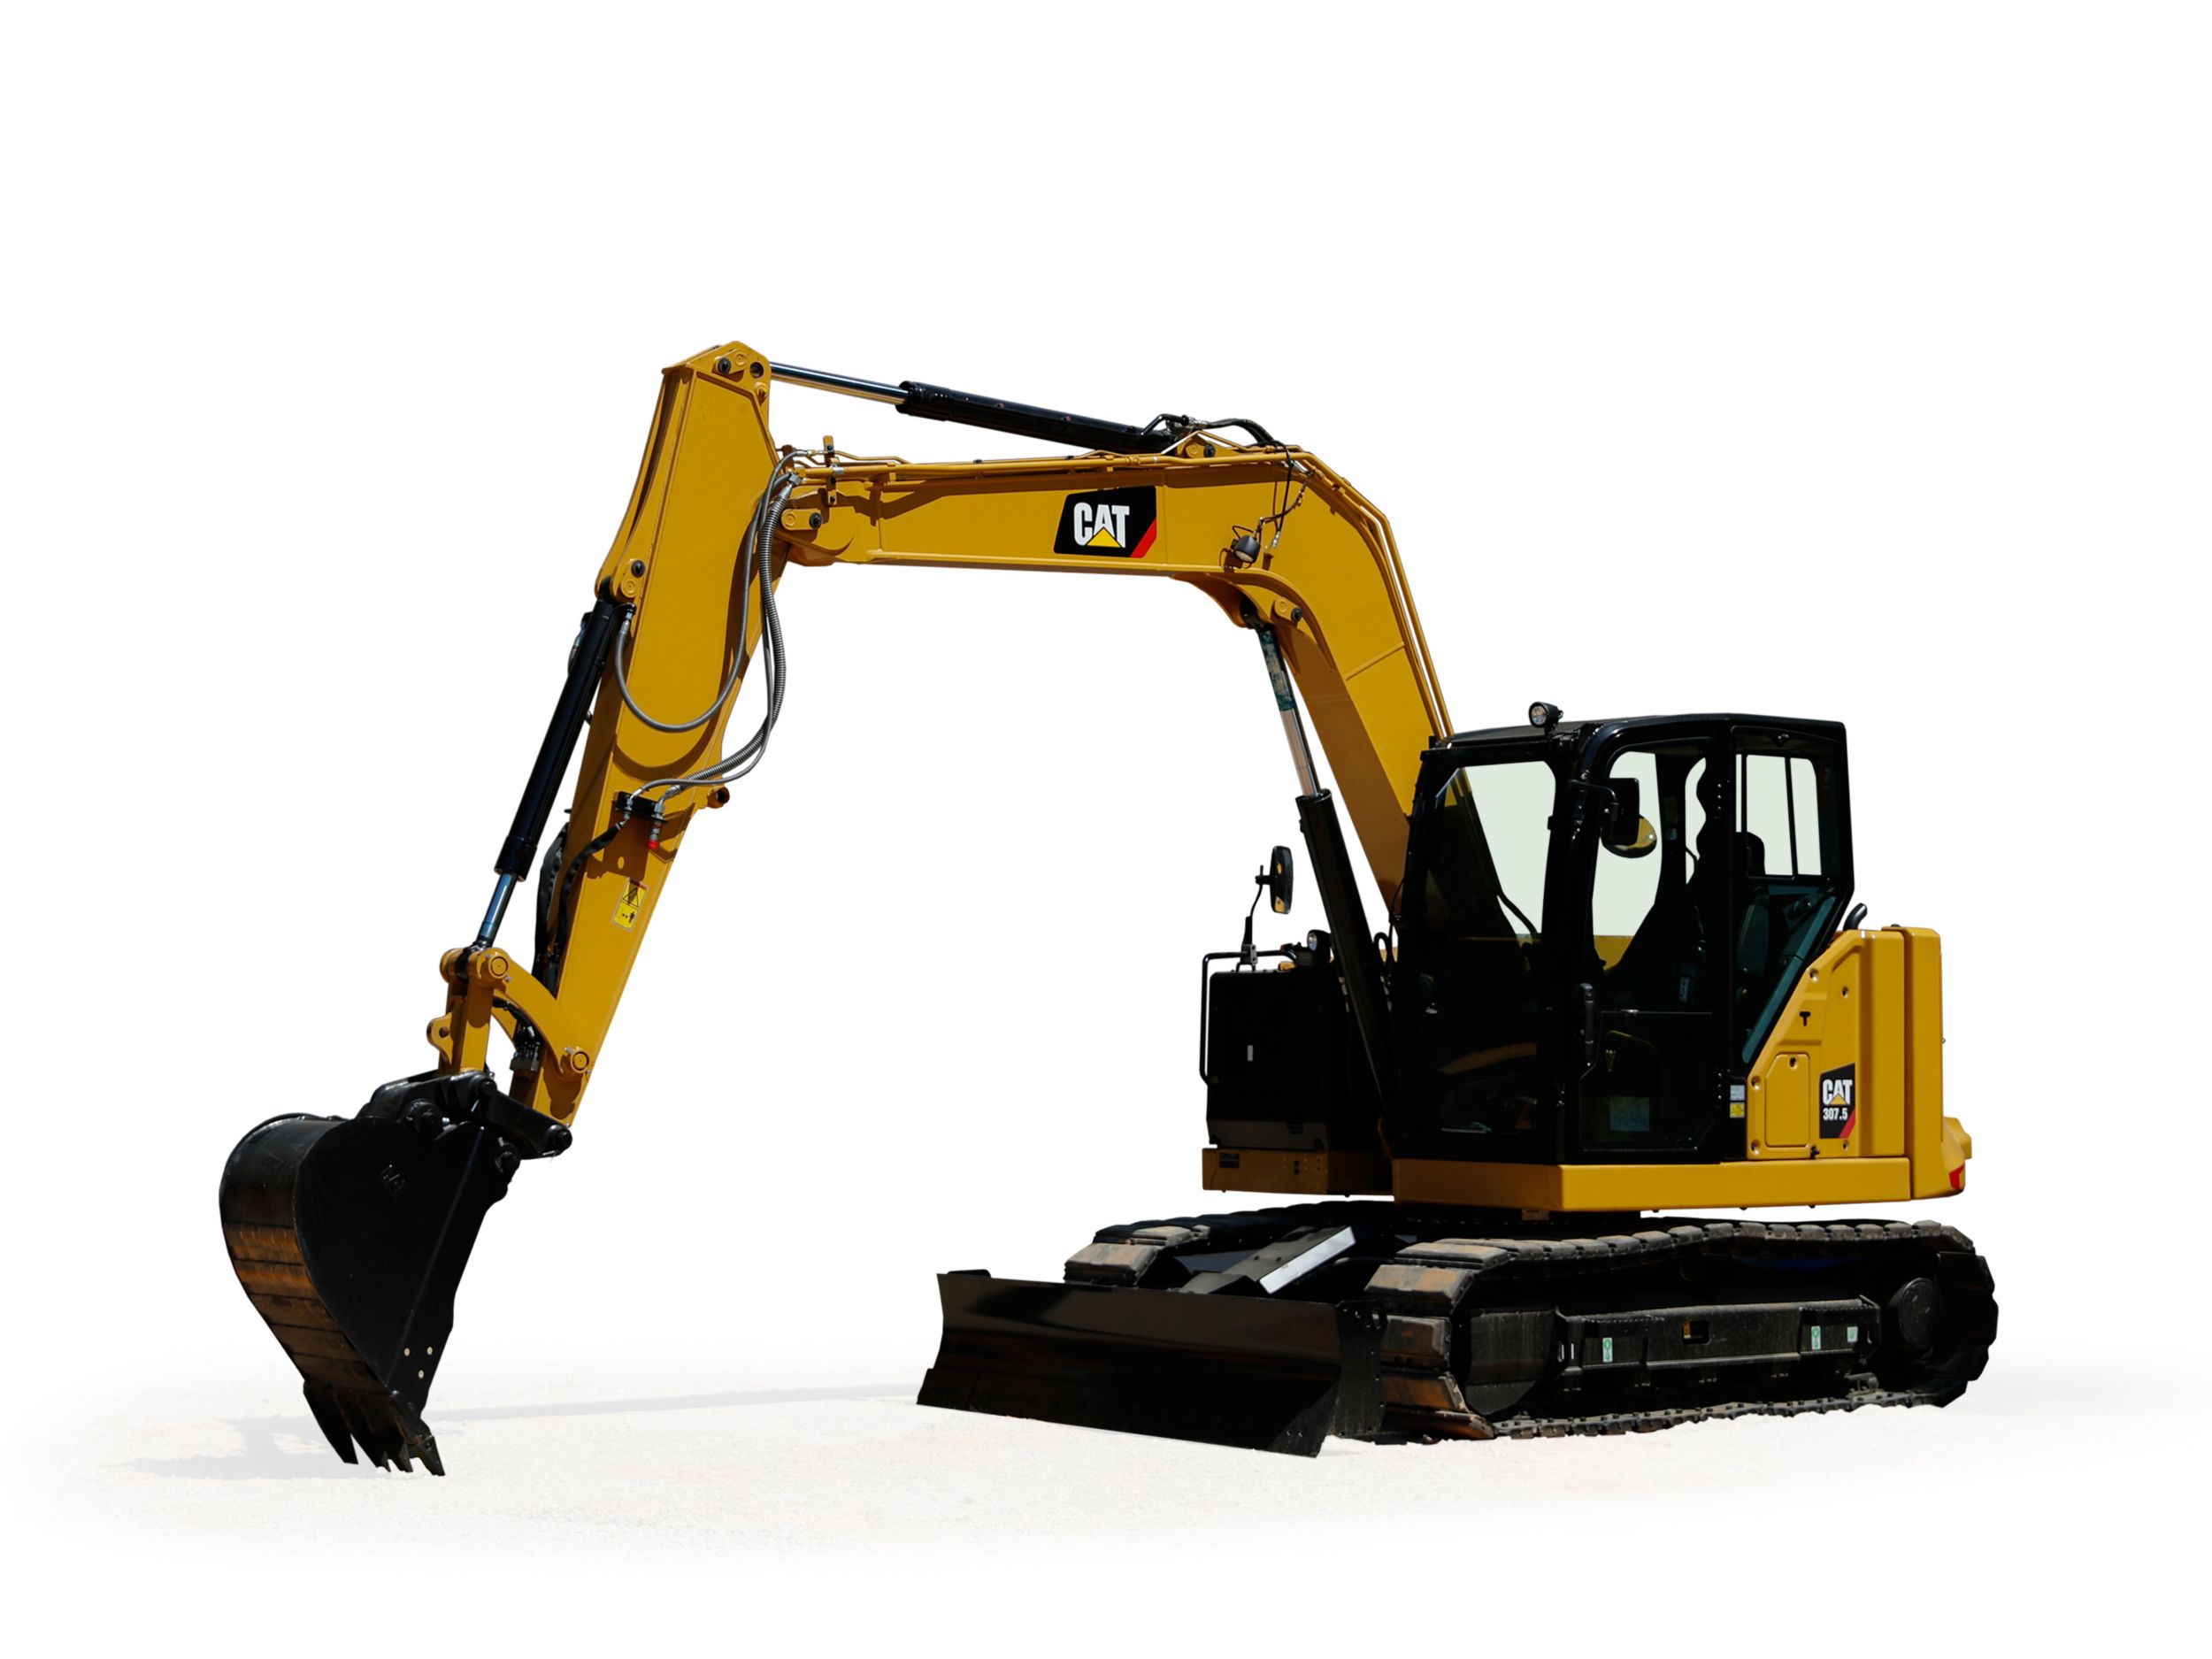
307.5
The Cat® 307.5 Mini Excavator delivers maximum power and performance in a mini size to help you work in a wide range of applications.
Learn More -
- Net Power
- 69.5 HP
- 51.8 kW
- Operating Weight
- 20077 lb
- 9105 kg
- Dig Depth
- 182.8 in
- 4643 mm
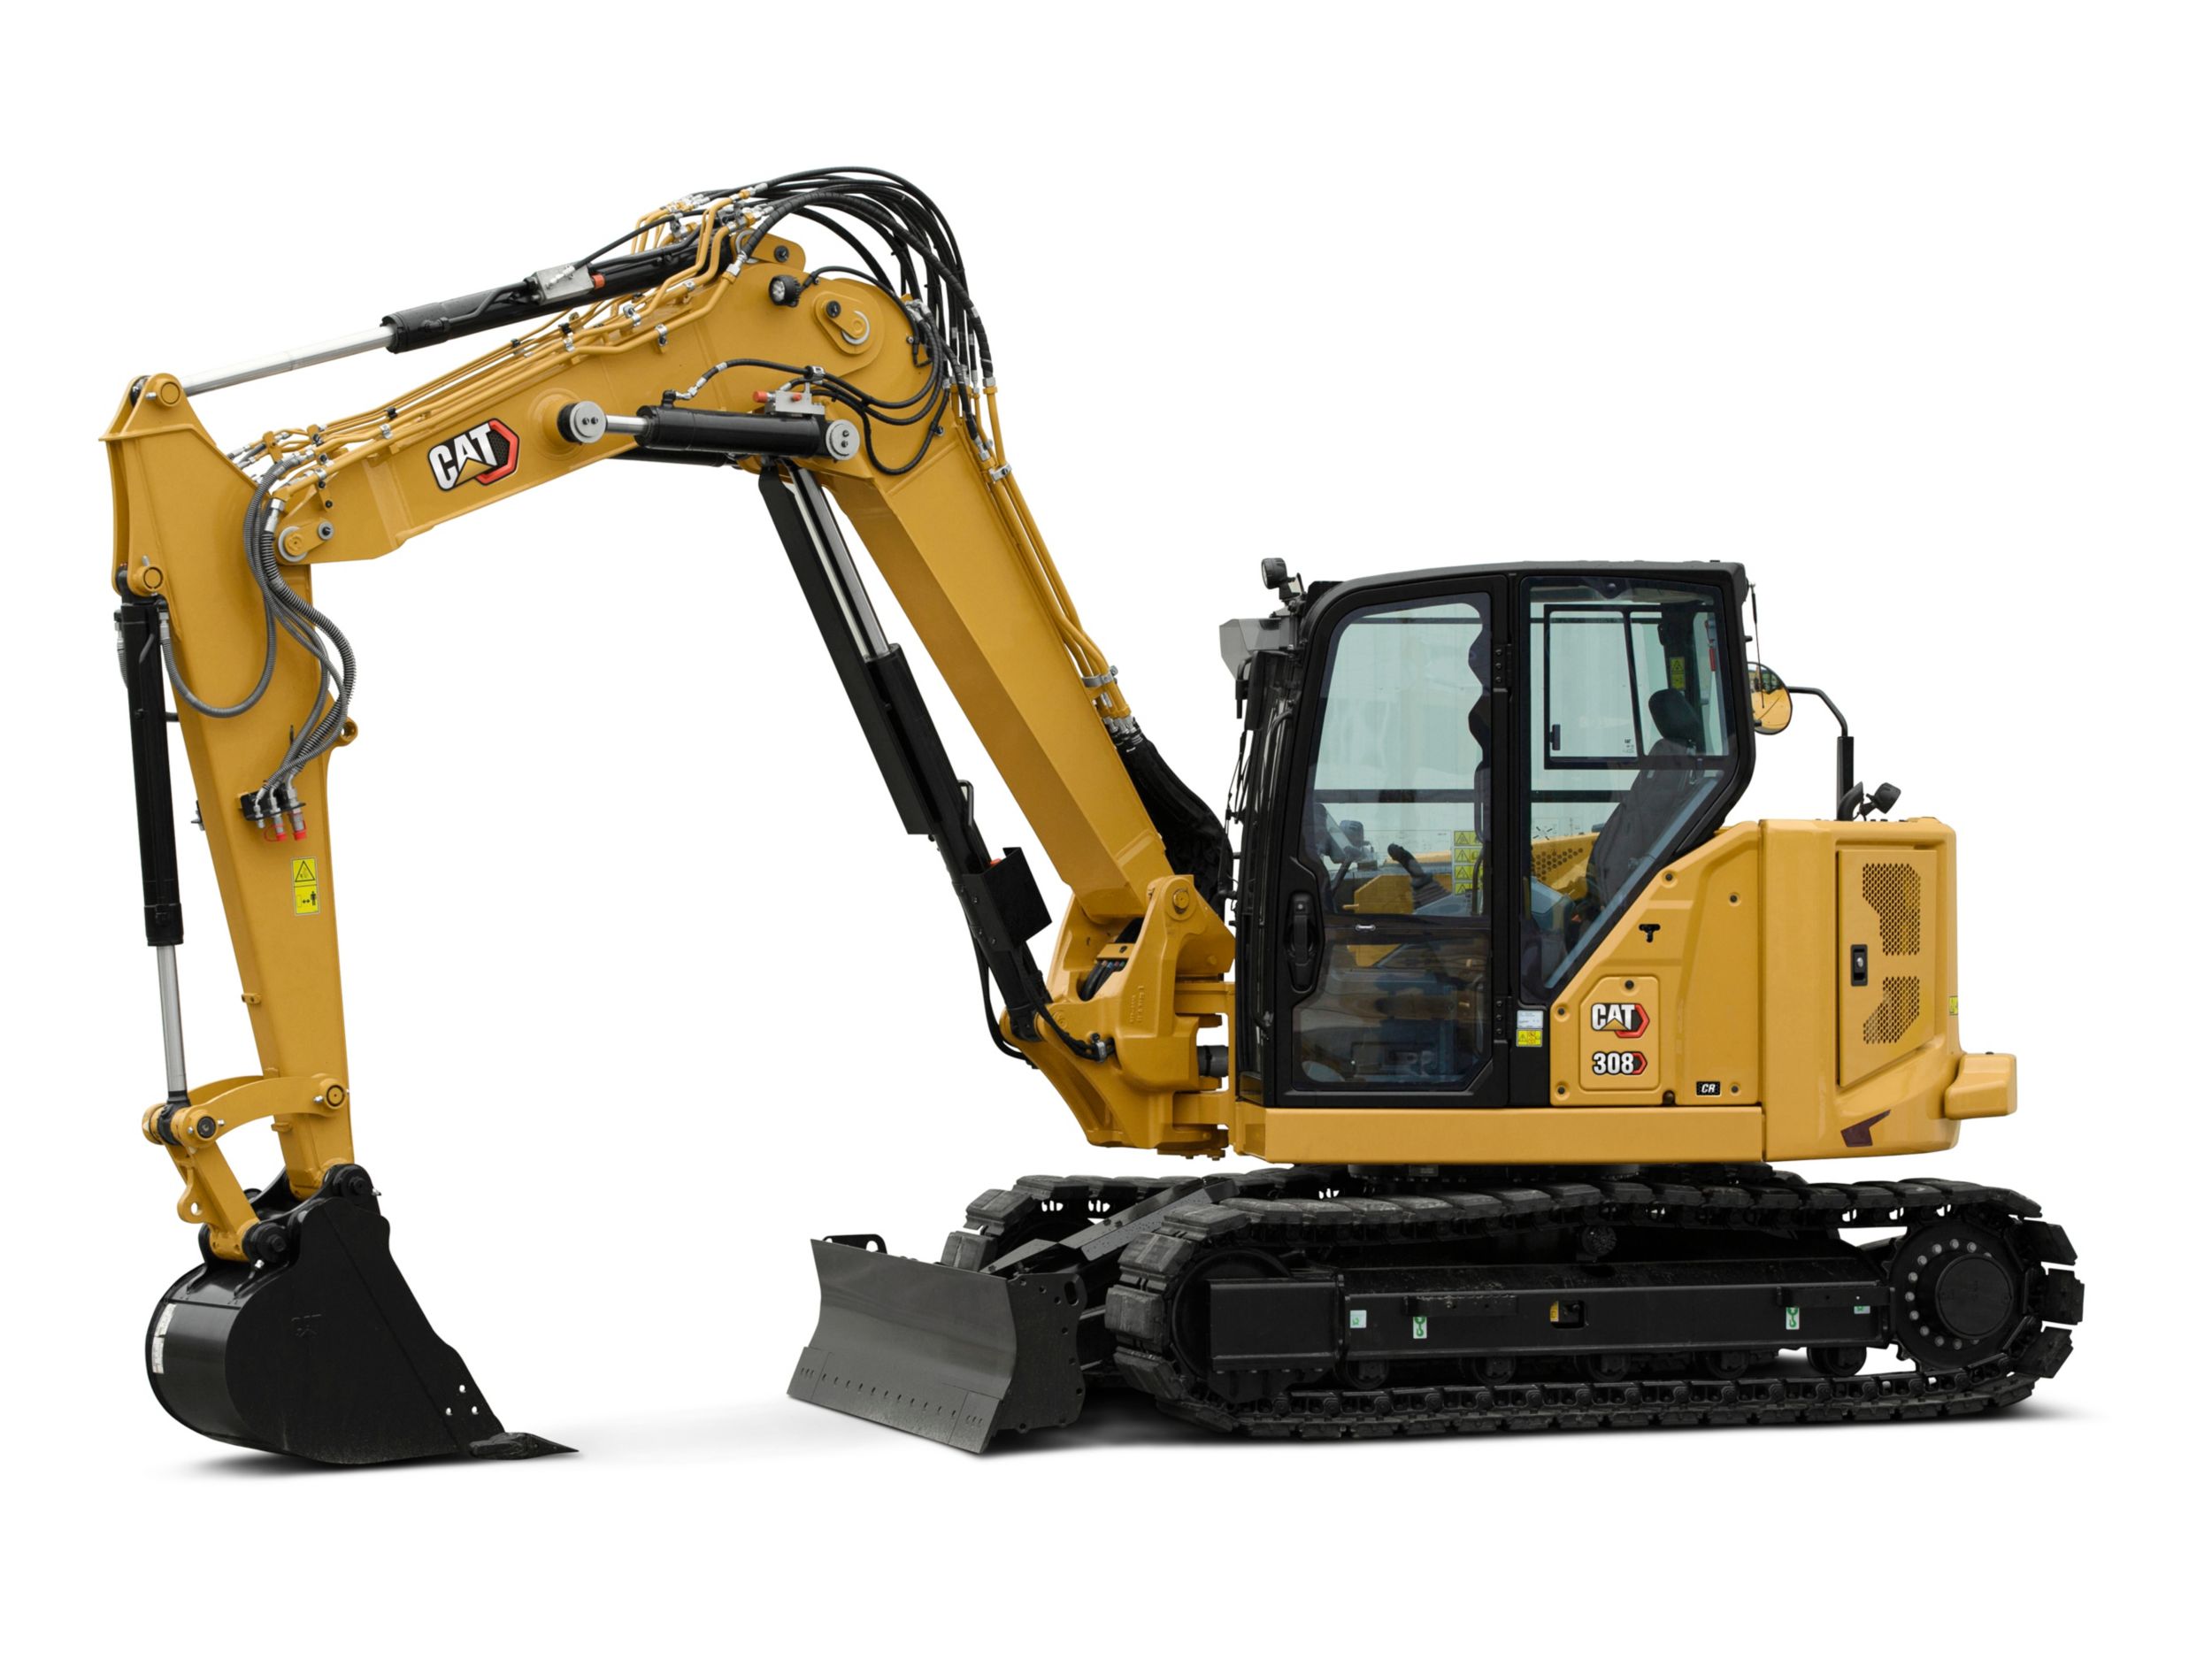
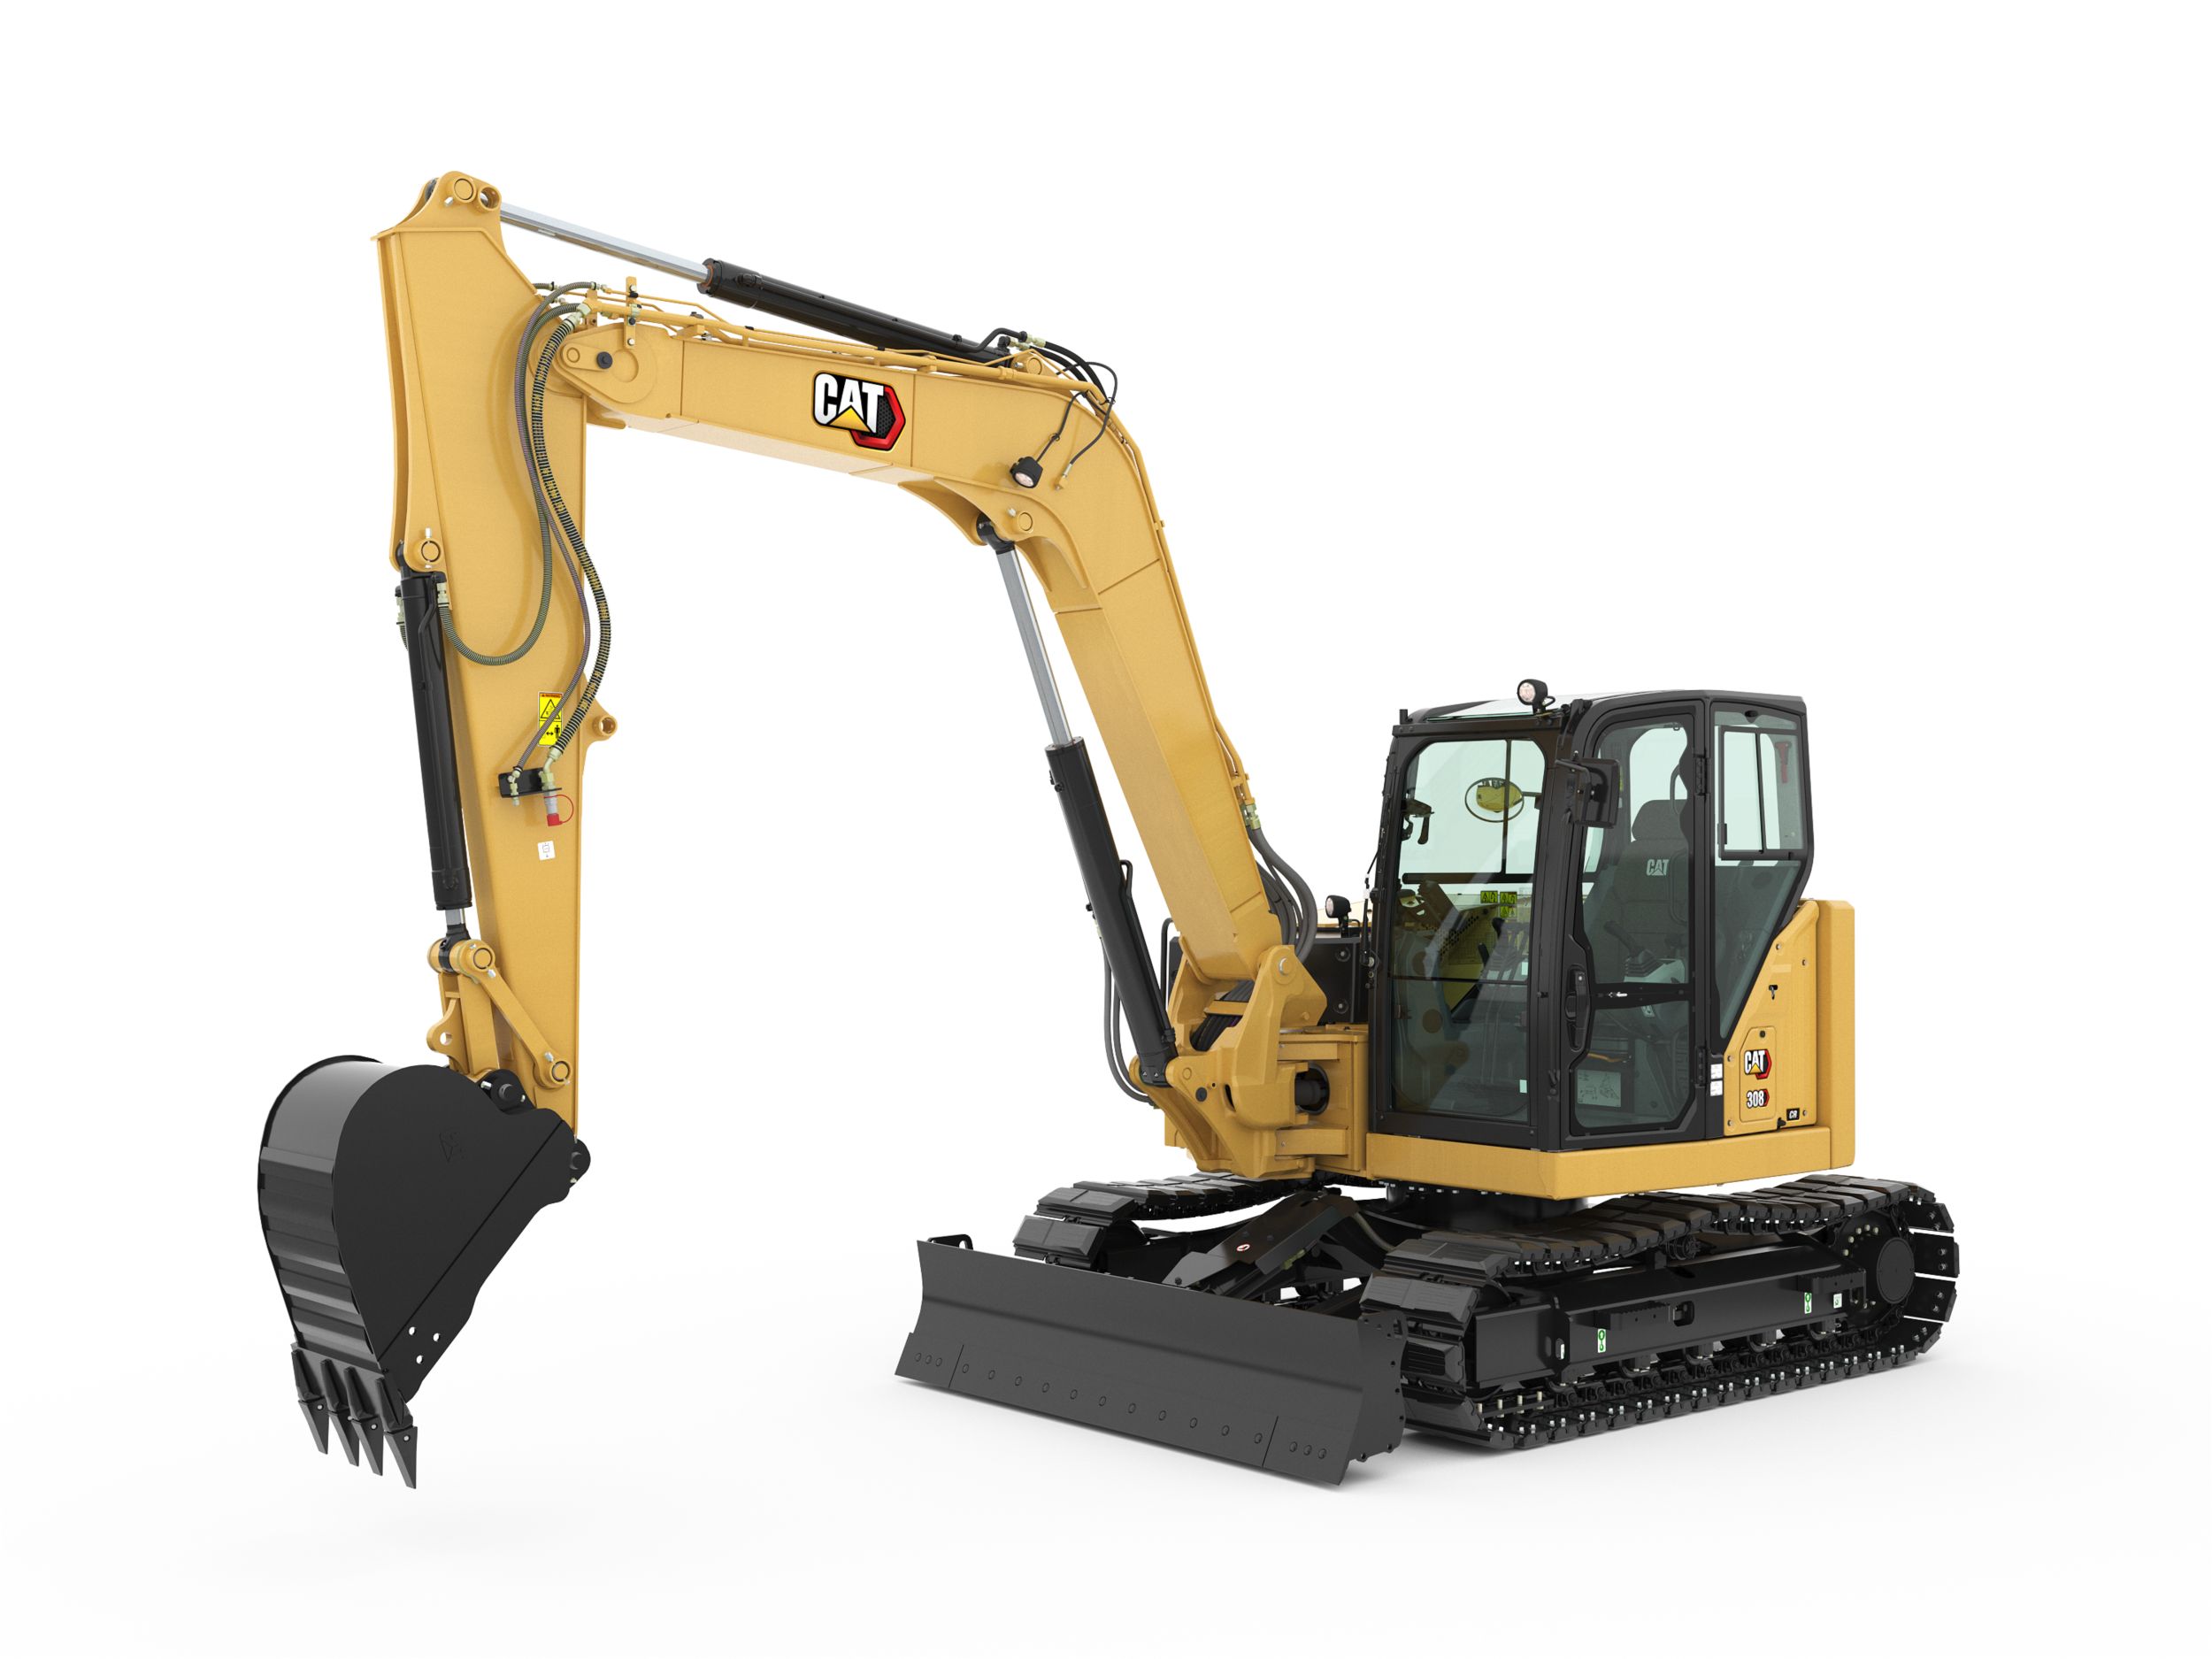
308 CR
The Cat® 308 CR Mini Excavator delivers maximum power and performance in a mini size to help you work in a wide range of applications.
Learn More -
- Net Power
- 69.5 HP
- 51.8 kW
- Operating Weight
- 17695 lb
- 8025 kg
- Dig Depth
- 185 in
- 4687 mm
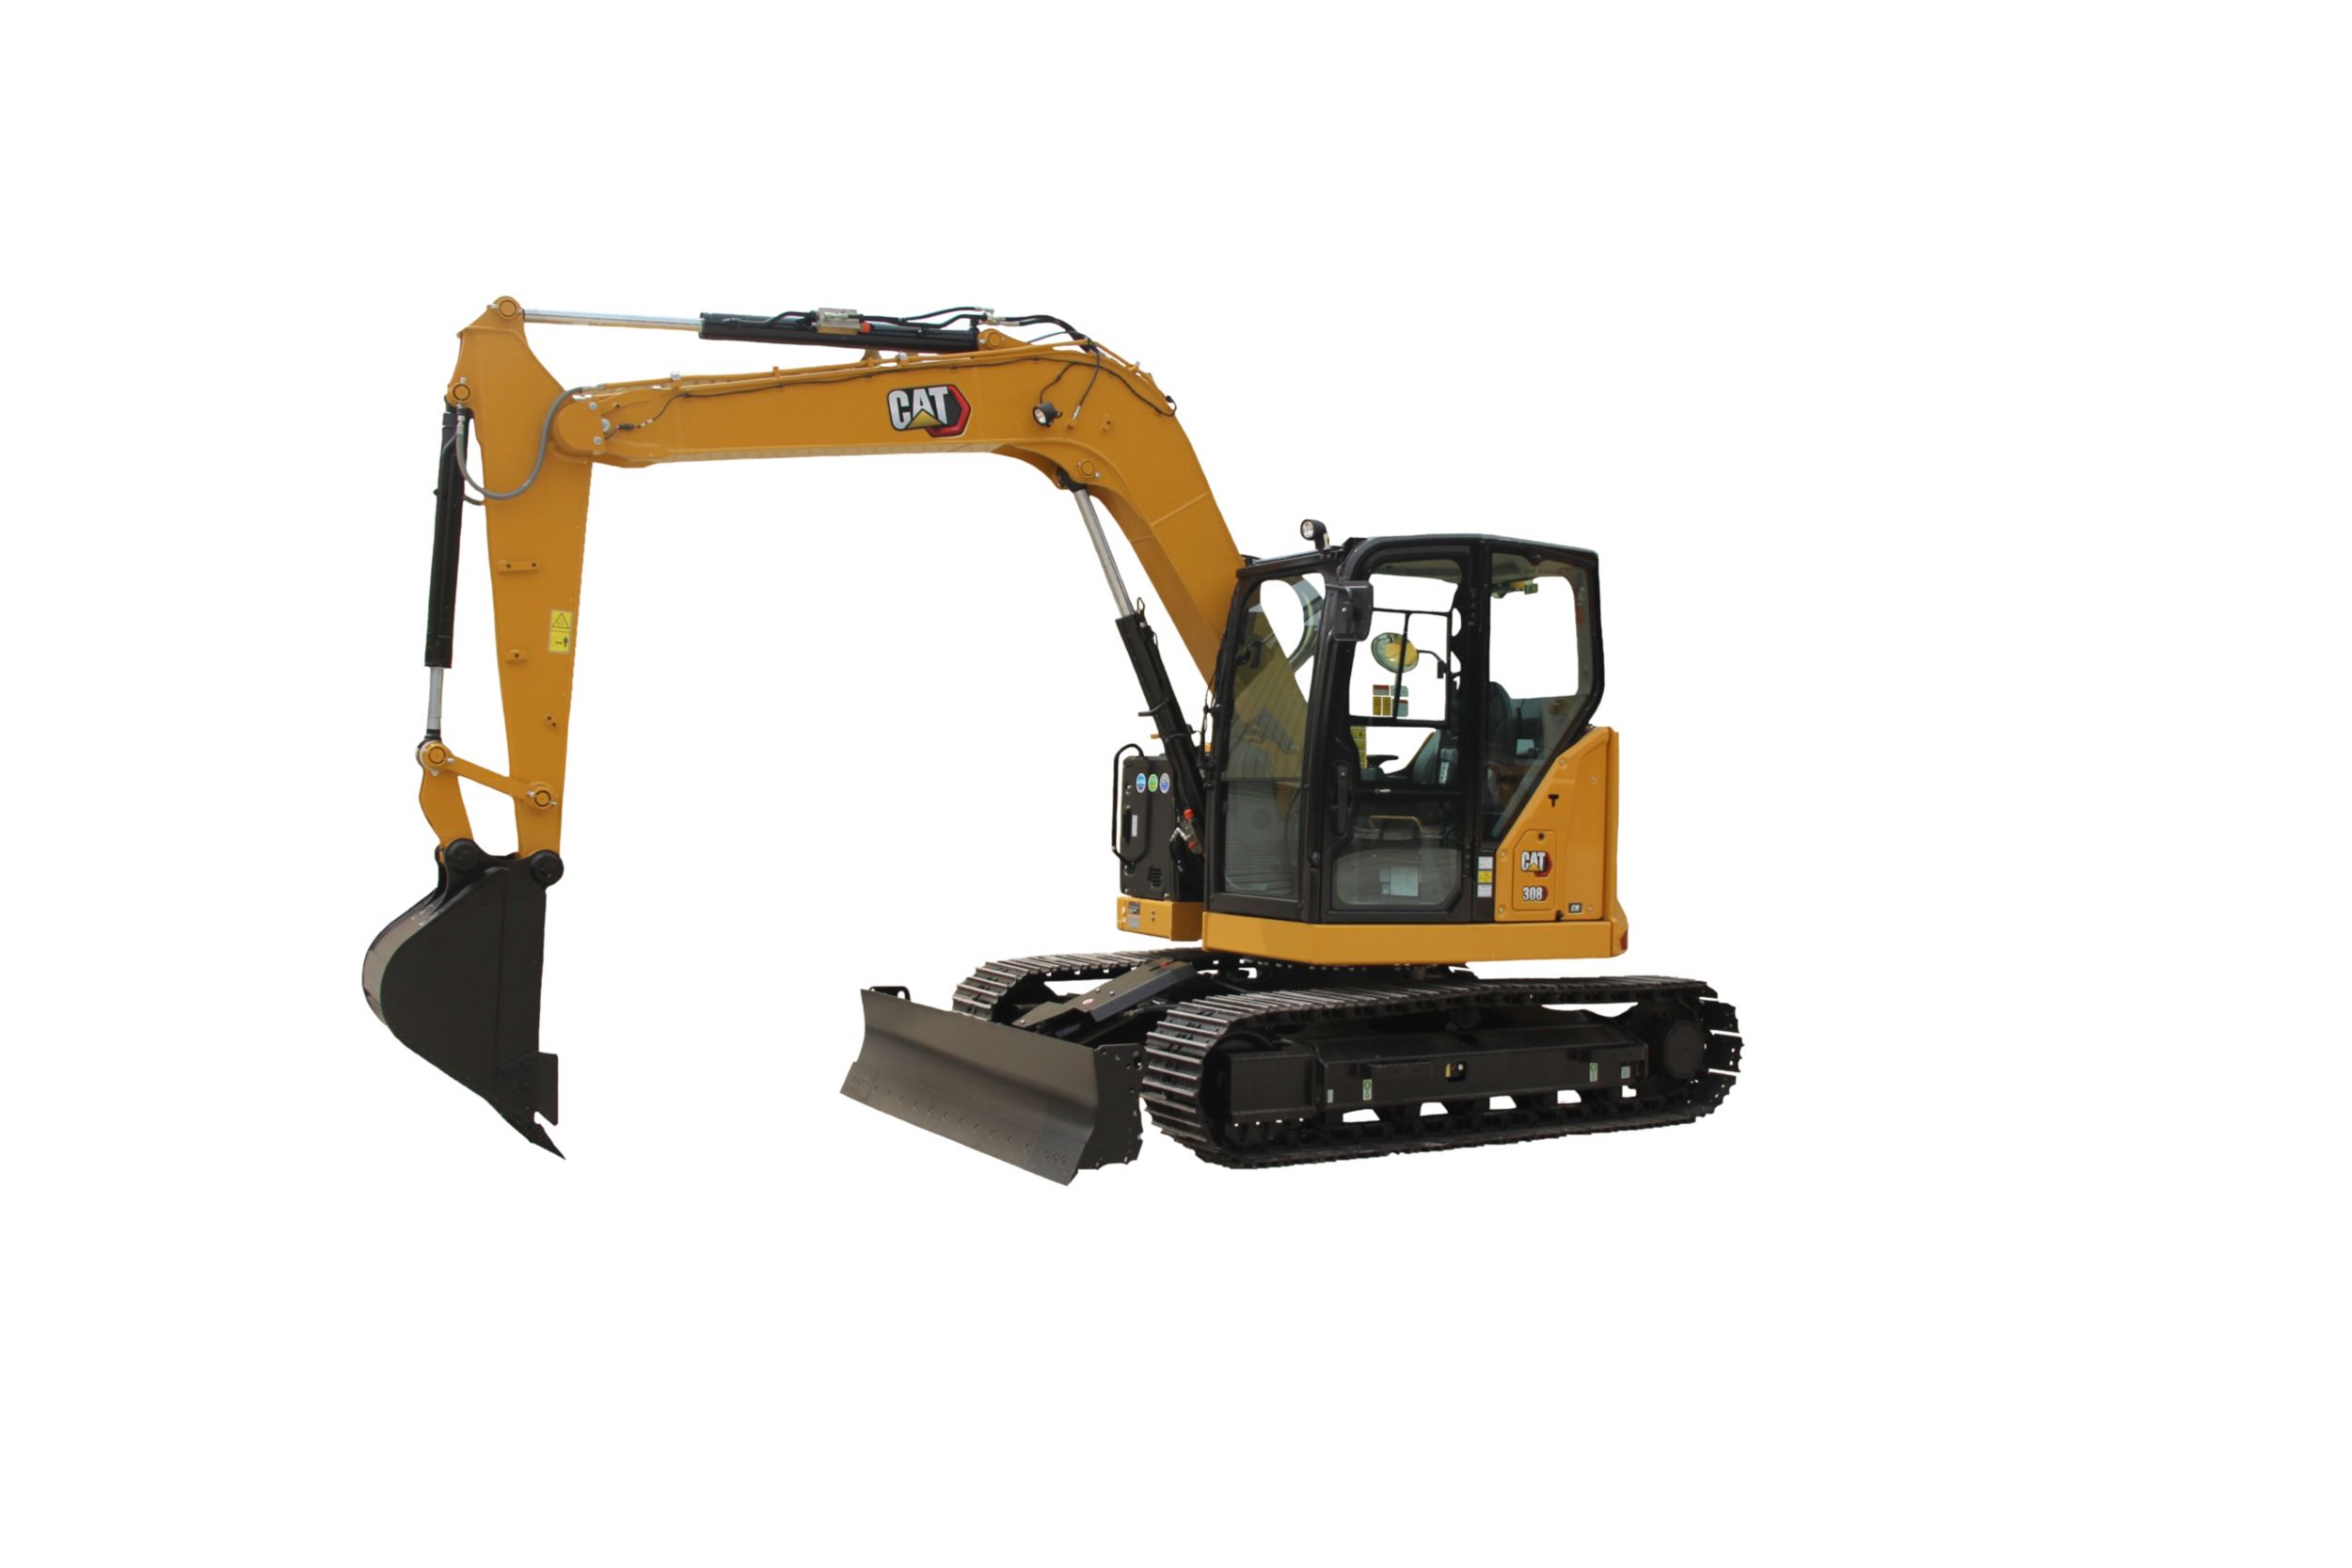
308 CR (Fixed Boom)
The Cat® 308 CR Mini Excavator delivers maximum power and performance in a mini size to help you work in a wide range of applications.
Learn More -
- Net Power
- 69.5 HP
- 51.8 kW
- Operating Weight
- 20385 lb
- 9245 kg
- Dig Depth
- 150.2 in
- 3815 mm
308 CR VAB
The Cat® 308 CR Variable Angle Boom (VAB) Mini Excavator delivers maximum power and performance in a mini size to help you work in a wide range of applications. The Variable Angle Boom provides the maximum in linkage flexibility in tight applications.
Learn More -
- Net Power
- 69.5 HP
- 51.8 kW
- Operating Weight
- 21091 lb
- 9565 kg
- Dig Depth
- 182.8 in
- 4642 mm
309 CR
The Cat® 309 CR Mini Excavator delivers maximum power and performance in a mini size to help you work in a wide range of applications.The 309 CR also features high flow hydraulics to handle power hungry attachments such as mulchers and brushcutters.
Learn More -
- Net Power
- 69.5 HP
- 51.8 kW
- Operating Weight
- 21477 lb
- 9740 kg
- Dig Depth
- 150.2 in
- 3815 mm
309 CR VAB (Long Undercarriage)
The Cat® 309 CR Variable Angle Boom (VAB) Mini Excavator delivers maximum power and performance in a mini size to help you work in a wide range of applications. The Variable Angle Boom provides the maximum in linkage flexibility in tight applications.The 309 CR also features high flow hydraulics to handle power hungry attachments such as mulchers and brushcutters.
Learn More -
- Net Power
- 69.5 HP
- 51.8 kW
- Operating Weight
- 22451 lb
- 10182 kg
- Dig Depth
- 205.2 in
- 5211 mm
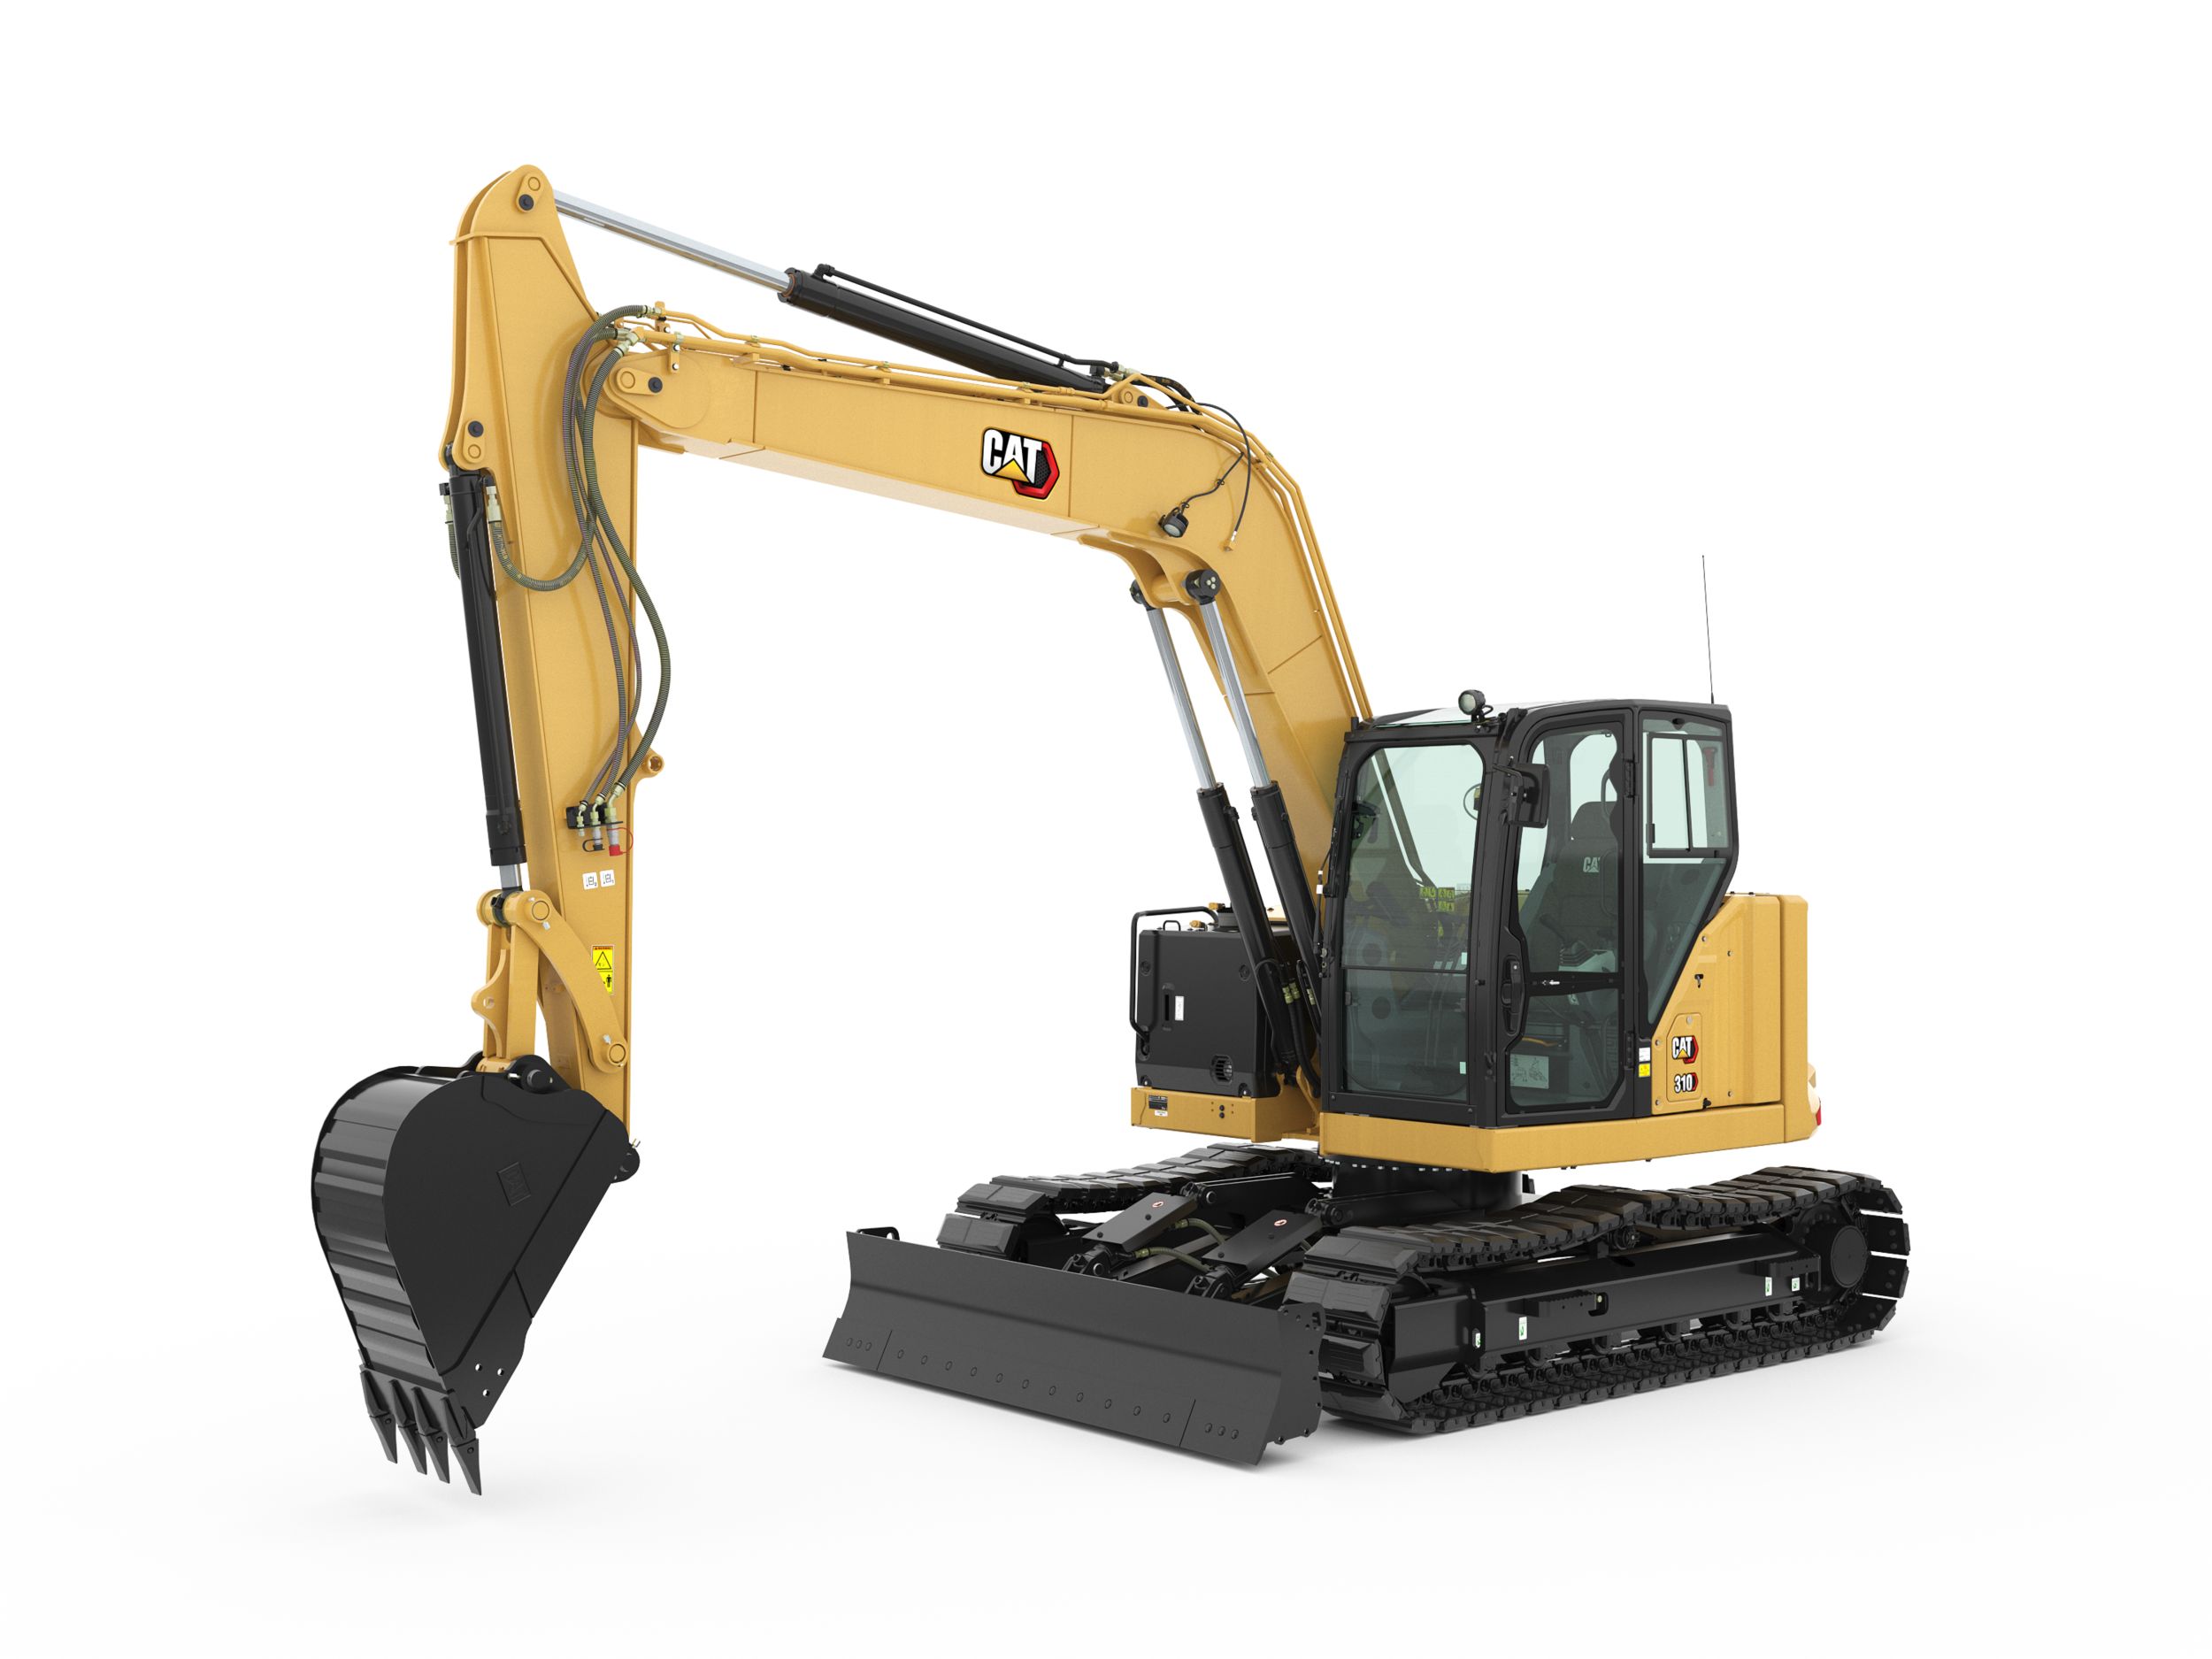
310
The Cat® 310 Mini Excavator delivers maximum power and performance in a mini size to help you work in a wide range of applications.
Learn More


Video Transcript
0:09 Hello everybody, I'm Simon Hill. I'm the product demonstrator, based at the Leicester facility. And today we're going to look at the ease of service features on the Next Generation Mini Excavators.
Service intervals. So it's 500 hours for your engine oil and filter, 400 hours for your fuel filter, and 500 hours for your hydraulic filter. Then we have up to 3,000 hours before the hydraulic fluid needs changing, and 6000 hours before the coolant will need changing.
Grease points on the machine: you'll see there's three here, the top one - 500 hours, that's the back of this swing cylinder. And then there's two more, a hundred hours each. They are for the inner and outer parts of the slew ring. You've then got your boom cylinder, stick cylinder, bucket cylinder and linkage. Recommended hours for those are every 10 hours or daily if in severe use.
On this side of the machine, you know, she's got nice flat panels and they are easy to remove. This one comes off with three bolts. So if this gets damaged or needs replacing, or you need access to the other side, there's a fuel sender I think behind here, you can take this off. Now at the back here, this is a hinge door. This gives you access to the cooling plant and on windy days, there’s a little stay here, stop that flapping about, and now you’ve got access to your radiator. And down here, there's an inline filter and the mufflers at the bottom, wiring harness and your filler cap. So you can check the condition of your radiator course, sweep it out, get an airline in there and blow it out if you need to.
1.53
Moving to the rear of the machine.
1.56
Again, you've got the stay here. You’ve now got your coolant level indicator and expansion bottle, air filter, down here you’ve got your oil filter and dipstick to check the oil level. You've got your fuel filter with water separator and people ask what this little device is at the top. This is electronic fuel priming. So when you put your new filter on and put that on empty so no filling it out of jobs, putting contamination in there, you screw it on, turn the ignition on, and it will prime it full with fuel again. Inside here this is your hydraulic tank sight gauge.
2.42
Now we move to the left-hand side of the machine for another hinged access panel. Three bolts need removing to get access to this. Again, you've got a stay, here we have the hydraulic tank with the hydraulic filler and in here is your hydraulic filter.
3.06
This side of the machine again, left-hand side, little door here, hinge door. This is where we have the optional battery isolator key if you've chosen that on the machine, got your accumulator here, pressurised cylinder for your valve and here is your valve bank.
Now at the seat deck of the machine, remove this panel, two little turns you do on these plastic connectors. We now have the battery, so you've got your battery terminals for jumpstarting this machine or jumpstart a machine from this machine. The battery is easily accessed, you cannot remove the battery without lifting the cab up, so this stops opportunists from stealing batteries on sites or if the machine's left unattended on a job site. To get the battery and change it, you can undo the bolts underneath, lift the canopy or the cab and remove the battery that way, which we'll show you later.
To raise the cab or canopy, you first need to remove both of these corner panels, this side and the other side, using a 16 ml wrench.
4.27
These corner panels just lift off, giving you access then to the other bolts that hold the cab down.
Now to raise the cab or canopy, there's two bolts on each side. It's 24 ml. I'm using a ring spanner on the top and a ratchet on the bottom.
4.49
Once you've got them loose, you can spin them by hand.
5.10
Yep, done that. They're safe.
5.13
Now we've removed the bolts both sides, using the grab handle, raise it up, and you'll see a safety brace click in at the back. So this is now going to hold it up. At the front now there's another brace I'm going to connect.
5.43
Yep, so this is supported both sides now.
5.48
So now we've had full access to the valve, the hoses, the battery, you can remove the battery by taking the cradle away. You have your alternator down there. At the top you've got your oil fill but there is one round the other side of the engine which I will show you later. If in the unfortunate - you have an unfortunate accident with hoses - you need to replace the hose, undo it at this end and then you can pull it through, through the swing cast, disconnect here, replace the hose and rethread it through.
6.26
I hope this video has been useful to you. Look out for more videos which we'll be doing with operator tips and more maintenance tips.